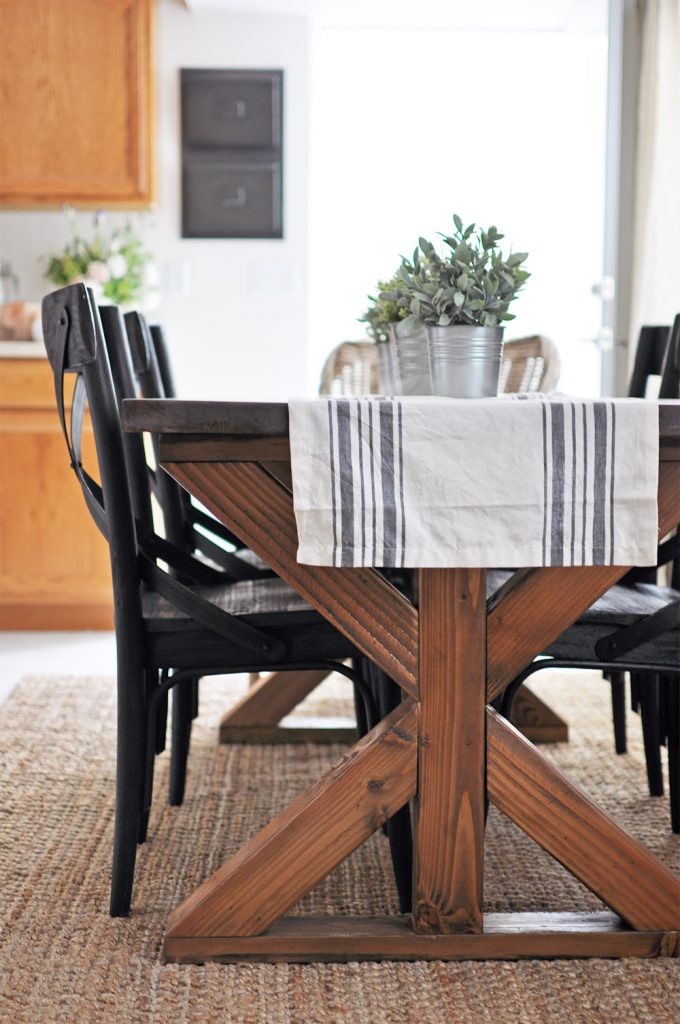
We love eating our meals outside for a many reasons, but I happen to enjoy how much easier it is to clean up out there! Spilled juice, no biggie…. getting up and randomly running circles around the table, well… we are still working on that but it’s definitely more socially acceptable outdoors right?
A big Thanks to Jamison at Rogue Engineer for providing the digital plans so I can share the tutorial for this DIY Outdoor Table featuring X Brace Legs and a Herringbone top! I can’t even express how much I am love the top of this table!

I saw a table at Pottery Barn that had these thick, chunky x brace legs and I knew I had to have it. The only thing is that I envisioned a different top. That is when I decided to send an email to Jamison at Rogue Engineer and told him what I wanted and that it needed to be able to handle my kids using it as a launch pad…..This gorgeous DIY Outdoor Table is what he gave me! So be sure and hop over to get the downloadable plans from him so you can make one too! : )

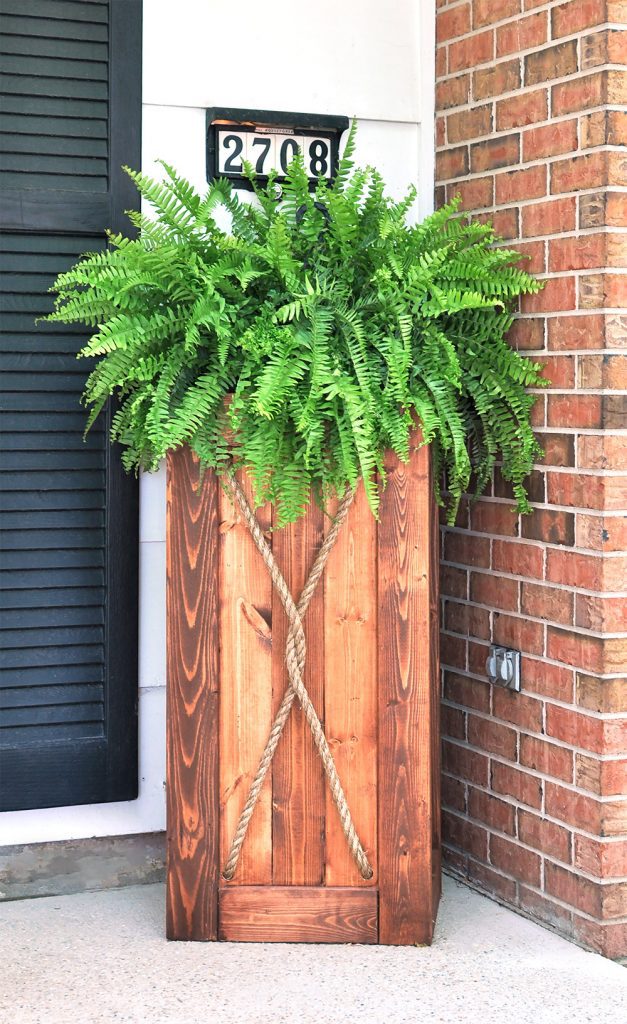
I know this table might look a little scary, but it’s a surprisingly easy build. It might not be the first project you want to whip out, maybe start with something a little more simple like my DIY Outdoor Planter to get used to using your tools. Don’t get me wrong, you don’t need to be an expert, but being familiar with some of these techniques will certainly help you!
DIY Outdoor Table
Some links below are affiliate links. Thanks for supporting Cherished Bliss so we can continue to provide you awesome, free content!
One of the most crucial tools in building this table is a Kreg Jig (and don’t forget your screws
). If you are planning on more outdoor projects, I’d suggest to go ahead and invest in the Kreg Jig HD
. It uses a little bit larger of a screw for a strong joint that will hold up to the elements.
Ok, let’s get started.
Step 1: Cut Lap Joints
First thing we are going to do is build our “x’s”. Cut your lap joints were defined in the plans. Start on the two outside edges and then make all your other cuts between those two, that way you can make sure you don’t cut the hole too big. These cuts don’t need to be pretty, because it will just be chiseled out.

Step 2: Assemble Legs
Once your lap joints are cut, we will build the legs. You just simple match the two lap joints together and attach with wood glue and screws. Make sure and double check where you are cutting your lap joints so that they are on the correct face of the wood.

Because these legs are cut at a 45 degree angle it leaves a very sharp point on the bottom of the legs. In order to keep the edges from breaking off you will need to trim it a little and sand it down. Using your circular saw, just saw of that little sharp edge where the line is…see below (note: legs are upside down in the picture so that is the part that actually sits on the ground).

Step 3: Assemble Frame for Top
Set the legs aside and get started on the top. The top is mainly built with pocket holes so it’s time to get some practice with your Kreg Jig! Attach using 2 1/2″ pocket holes.

Step 4: Add Trim to Frame
This table is trimmed out with 2×4’s so we will need to add those around the edges. Since the herringbone pattern is inlayed in the top you need to attach the trim pieces leaving the 3/4″ space where the 1/x4’s will be attached. The best way to do this is to add scrap 1×4″ pieces under the frame (not the trim pieces). Just be sure you are working on a level surface.

Step 5: Assemble Table
Now comes the fun part, putting it all together! Attach your legs to the table top frame with wood glue and screws. I actually attached the 4×4 beam to each leg before attaching to the top frame (you will definitely need a Kreg Jig HD for this part). That way you can center it up and be sure you are even on both sides, plus it was just easier to do it that way for me.

Step 6: Herringbone Pattern
This is probably the most difficult part. It’s not that it’s hard to do, but it’s tedious. I definitely recommend measuring and cutting each piece individually here. Obviously no piece of lumber is perfect, and it’s amazing how easy it is to get off on your measurements when a board is just a hair wider than another one. So what I found easiest for the top was to cut all my pieces and lay them in, get everything lined up and using wood glue and my Ryobi AirStrike Finish Nailer I attached each 1×4 one at a time.

Now all that’s left is to sand and finish your new table! :) I used Thompson’s WaterSeal wood stain & sealer in Moroccan Brown. I really liked that for this table since it’s a one coat coverage! and because I desperately wanted to get this table done and not wait for everything to dry (impatient much? haha).

Our new table is so sturdy with the 4×4 legs. I absolutely love it! If you want to build your own, be sure and snag those downloadable plans!


If you happen to make one of these tables I would LOVE to see it! You can also hashtag #cherishedbliss on social media so I can find you!
Looking for more woodworking plans? Here are a few more:


Amazing! Love it and all the others too!
Debbie
This free plan is great! El Paso Fence Contractors are so excited to make this project a reality. Big thanks!
That table looks awesome! You did a great job!
Exactly! The outcome is flawless and quite impressive!
drywall repair marietta
wow that table!! Seriously so great! I have been wanted to get more into wood working, I have loved all of your wood projects. Thanks so much for sharing them!
-Shonee
http://www.hawthorneandmain.com
Wow, it’s amazing to see what women can accomplish these days! What other feats do you think women are capable of achieving? And by the way, kudos to you for being awesome!
What a gorgeous table. Thank you so much for sharing the plans. Definitely pinning this. And I completely agree that eating outside is much better than eating inside when the weather is nice. Clean-up is much easier.
Indeed an incredible project!
Love this table! Where did you get the chairs?
Love this table!! Is there a link to the plans? I’ve clicked on the download link provided, but it’s connected to the outdoor planter.
Thanks so much!
I know exactly where to put this! They are framing our new back porch now. Thanks for sharing
Wow! That’s amazing. Can you share your works with us?
Love the table! Curious – is there a specific reason why you don’t use treated lumber if it’s an outdoor table?
Thanks Jen. I chose not to use treated lumber since I knew my kids would be eating on this table. Treated lumber isn’t really meant for furniture and items that you will be sitting on and touching repeatedly, in my opinion. That is more for fences and maybe storage benches, things that aren’t meant for everyday use. Of course you can use treated lumber if you think that would suit your lifestyle better, but it was just a personal choice for our family : ) Hope that helps!
Because treated lumber is covered by impregnation cut’s, each one a 3/8″strait cut, spaced about 1/2″ apart in all directions. A 6ft. 2×4 has at least 2000 of these cut’s in it.
Another solid valid reason for not using impregnated with creosote pressure treated lumber is just that you don’t want to be eating and putting food on a table that’s covered with creosote, yum!
Hi! Love the table! Just wondering if you had an estimated cost for the materials? Thanks!
Love this table! Where did you get the chairs?
For everyone who is asking. The Chairs are from Lowe’s. Item # 740360 Model # 63001
I love the simple yet elegant look of this table. Thanks to your free plans, I won’t have to DIY again after finishing my basement. All the best!
Hi Jen! What a beautiful table! Thanks for sharing. Like Katie Hall, I’m wondering if you could tell us where you purchased the chairs to go along with this table. You did such a great job pairing the two!
Thanks!
Sara
I love this table. I’m concerned about wood movement over the course of the summer and winter. Did you find any issues in that regard?
Hi David, There was some movement, but nothing that was a big deal to me. The only place I saw movement was the pieces in the top for the herringbone pattern, however if you were to pre drill and screw those pieces down that would probably eliminate most of that issue, I just didn’t have the patience, nor did I want to see all the screws on the top. ; )
Love this! I am thinking of making my own dining table and this is gorgeous! How much did it cost to build?
This table is amazing and I absolutely love it! Your herringbone top was the inspiration for my own table! I switched things up a bit for mine and if you want, you can check it out over at ahintofhome.com. I made sure to link to your post in my tutorial. :)
Aww yay! It looks amazing! I miss that table so much!!
My husband and I are going to make this table this month! I love it! Do you have any plans for a bench for one side? Also, where did you get those awesome metal chairs?
Hi Ashley,
thank you of sharing the design and plan… this is amazing! I was also wondering where you found those chairs?
thank you!
how has the Thomson’s waterseal all in one stain held up? I’m in Illinois and just built the table. I used a similar product by Pittsburgh paints. I’m wondering if a var urethane or poly should still be applied. I mainly worried about all the knots in pine not holding up. During cold months I will cover the table but will be leaving it outdoors.
At this time I don’t need a table (although it is very nice)but I really like the chairs, just what I have been searching for (searching for quite a while). Would you you mind sharing where you purchased the chairs or who manufactured them.
Thank you, Terri
Love this table! Where did you get the chairs from?
Thanks, Kelly
Lowe’s. Item # 740360 Model # 63001
You said you use Thompson’s water seal and stain in a Moroccan color but I don’t see that color on their website. Can you verify the color or brand?
Thanks for the plans!
Did you ever find this stain? I can’t find it either.
Hows the height? I’m about half way through the build and it seems to me that it might be too high. Thoughts?
The height should be around 30″. It is on the taller side for the average table height of 28-30″ but we never noticed any issues using it with standard outdoor chairs.
I made it by myself thanks to stodoys. I think it’s the best way to learn how to build that.
About how heavy is the table? Super cute design and it seems like a pretty simple project given the right tools. I’m just worried about transportation. Also, would it be possible to prepare and stain the tabletop and legs separately, then assemble once inside the space? I’m thinking about using this as an indoor dining table.
Hi there, love this table and the deign. Would you mind sharing the estimated cost for the lumber? Thank you!
As someone who does a lot of woodworking and has built several tables, I commend you on this project. Nice way to handle the legs, very nicely done. I hope it serves you well for years to come.
Great design! I have always been interested to have like this for my garden. Can’t wait to start to build my own outdoor table. Thank you for inspiration you give to me.
This is great! Thanks for sharing! I plan on doing something very similar in a 4×4 ft square (high top, maybe?) table. I have a few questions if you don’t mind! For the frame, approximately how far are the legs from the actually edge of the table? Since my table would be a different shape/size I guess I’m wondering how much smaller I should make the frame? Like maybe 4-5 inch away from the table top edge? Also, is there a way to hide that long piece connecting the Legs? I really want to go fo a very minimalistic look so I’m wondering if that piece is necessary or if it was really just the look you wanted to go for? Lastly, you framed the table top, which I hadn’t considered but I understand why, but if I’m going to finish it all with food filler prior to staining to give a cohesive look, do you think that part is also necessary? Sorry for all the questions but this was the best tutorial I found!
Thank you for the design! I just finished building it. I can’t find the stain color you chose. Any help on finding that would be appreciated.
Thank you for this Great and informative site! snow plow service
Wow! This could be one of the most useful content we have ever come across on the subject. Actually excellent info! painters
You have a distinguished talent in explaining things. Thanks for sharing this here.cesspool service
This is such a easy article to follow, great job! Ace removals
This is awesome house! Great bedroom with amazing home improvement work. I would definetly love to have home like this.Total Conquest MOD APK
When I try to download the PDF there is an error. Is it still possible to get the downloadable plans?
MFA Services
I read your blog. Having very use full information help me a lot. I will read more articles on your blog.
thank you for more information
Thanks for sharing your awesome knowledge. I really appreciate your thoughts on this topic and I will return to your website. Thank you for your kindliness!
Amazon ERC
Thank you for the design! I just finished building it. I can’t find the stain color you chose. Any help on finding that would be appreciated. :)
This is such a easy article to follow, great job!
thanks for providing these outdoor table free plans diy.
When I try to download the PDF there is an error. Is it still possible to get the downloadable plans? :(
Great job Aley!
UltData MOD APK Download is a Tools app with a user-friendly design by Tenorshare Co, download the best mobile application premium version https://apknain.com/ultdata-mod-apk/
Imagine a life without electricity – no light, no fan, no TV, no charging points, no refrigeration. For many households in rural Bihar, this is a reality. But that’s about to change, thanks to the Bihar Har Ghar Bijli campaign launched by the Indian government. This initiative aims to provide electricity to every household, transforming lives and boosting economic growth in the region.Visit Now
I cant imagine life with out electricity!
residential plumbing
Very much appreciated. Thank you for this excellent article. Keep posting!
San Jose Tree Services
kalyan chart panel chart is a number of SATTA companies in Indian. Many Indian peoples are playing this kalyan game number. This game is genuine and trustable …
Our goal is to meet the needs of people of all ages by publishing news classed as General, sample-paper.com, sample-paper.comntertainment, education, and world news are all covered.Our reporting team plans to provide the Education & Recruitment Update for all age groups and to present the actual picture of recent events through inside coverage. and so on. Political,
Oh my goodness! Amazing article dude! Thank you so much,
thanks for this helpful information. must read who-are-payton-gendron-parents?
“Very interesting stuff to read.
“
Thanku for your usefull informationElon Musk’s Tesla-details
“Such an awesome post. Thanks for sharing!
Tree Removal Edmonton“
“very informative content, thank you for sharing
Tree Service Bowling Green“
“Awesome read you’ve got there, I’ll have to pass it on!
Tree Service Las Vegas“
I appreciate you sharing this content! Resin driveways have grown in popularity in recent years due to their appealing look and durability. DrivewaysinEdinburgh
I had never considered this perspective before reading this article, and it’s left me with a lot to ponder. Great job, author!
https://cincinnati-seo.org/
This article is a valuable addition to the literature on this subject. The author provides a comprehensive overview of the topic, drawing upon a wide range of sources.
https://millerstreecare.com/
wow good read, very interesting
what did you do with with the leftovers?
This is so nice! DIY has become my hobby in the past few months. Thanks for sharing!
Amazing! As a drywall contractor, I can’t believe it’s just a DIY. Great job!
Simple and stylish – this DIY table nails it!
Your outdoor space just got an upgrade with this table!
Impressive craftsmanship on this outdoor table, great job!
This looks like a fun weekend project, can’t wait to give it a try!
I’m always on the lookout for budget-friendly DIY projects – this is perfect!
This DIY table would be perfect for enjoying morning coffee or evening cocktails outdoors.
I can already imagine hosting a barbecue with this table as the centerpiece!
I’m bookmarking this for my next weekend DIY project, thanks for sharing!
I never thought I could make something like this, but your tutorial is so helpful!
This DIY table is giving me serious backyard goals – love it!
A DIY project that’s both practical and picturesque – well done!
I’m sold! Time to upgrade my patio with a table like this.
This DIY table is the missing piece to my backyard.
This DIY table is a must-have for any outdoor gathering.
Simple steps, stunning results – can’t wait to try it myself!
I can recommend this to my friends. Can you tell me where did you bought the chairs?
It’s a great post you shared. Thanks for this.
I am glad to check this site for this informative content.
Definitely considering this for my next DIY project!
Wow! This could be one of the most useful content