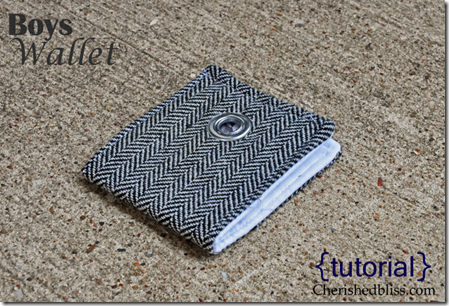
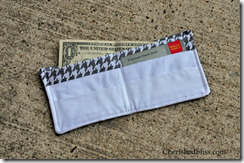
I am so excited to be share this with you because this wallet with be wrapped up under a tree for not only MY special little boy, but 5 others! It is very easy, cost friendly, and will make any little boy smile. Of course you cannot give a wallet without money in it so… you know they will like it for sure! Plus every little boy needs a wallet with a dollar in it!
So let’s get started! You might be able to make this with some scraps if you’ve got a lot lying around! Here is what you will need:
Supplies
– 1/4 yard of any suiting or other thick fabric
– 1/4 yard for the pockets (I used white fabric)
1/4 yard for the lining (I used houndstooth fabric)
– fusible interfacing
-optional grommets or other embellishments
Tutorial
Cutting List
1- 4×9” from the suiting (exterior) fabric
2 – 4×9” pieces of fabric for the pockets
3 – 4×9” pieces from the lining fabric
Instructions: (use 1/4” seam allowance UNLESS specified otherwise)
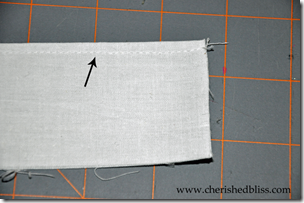
First: Take your to 4×9” pocket pieces, fold in half and top stitch along the fold.
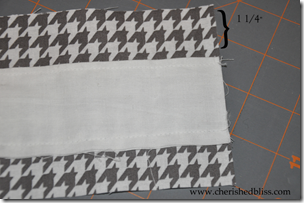
Second: Lay your pocket piece that you just top stitched on top of the lining piece. Pin it in place 1 1/4” from the raw edge of your lining. Then top stitch along the bottom of your pocket piece. This creates the bottom of your first card slot.
Third: Line up your other pocket with the bottom edge of the lining piece.
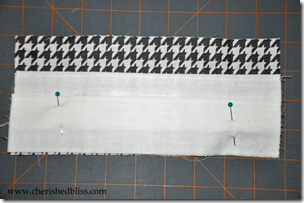
Fourth: Take your second 4×9 lining piece and your pocket piece and sew across the top with right sides together. Turn right side out, press and top stitch, see picture below
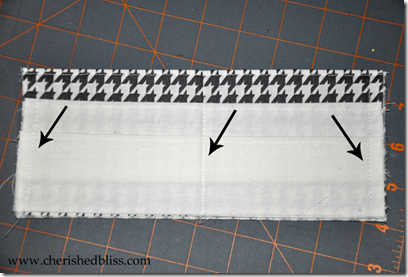
Fifth: Sew a line directly down the middle and on the sides.
Sixth: Baste your pocket piece (above) onto the right side of your last 4×9 piece of lining fabric (this creates the lining for your money pocket). Line it up on the bottom. You will only baste along the sides and the bottom, this is how you make the money pocket. Your 4×9 lining piece should stick out above your pocket piece. (forgot the picture here, sorry, you can email me with any questions!)
Seventh: Attach your interfacing to the wrong side of your exterior fabric.
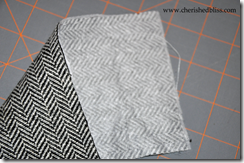
Eighth: Place your exterior piece and your pocket piece right sides together. Sew around the outside leaving about a 3” gap in the bottom to turn. Make sure to backstitch around your opening. Turn. press your gap and top stitch all the way around making sure not to sew up your money pocket!
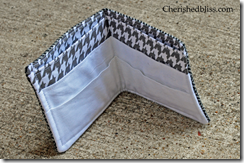
Last but not least accessorize it however you would like. I chose to put a grommet in the front just for a little something extra, but you can leave it the way it is or do something completely different! Have fun with it!


Very cool, & very well done tutorial! I may have to try this out one day!
These are so cute! I love your fabric choice. Thanks for the sweet tutorial!
LOVE this! Great tutorial and I love the fabric. You should totally come link this up to my fashion linky party! Its called DIY Diva Thursdays and we party every TH-M :)
Kara
http://www.mineforthemaking.com
Like your wallet! Thank you so much for the tutorial!!
Love this tutorial! It took me longer to pick out the fabric than sew! Thanks so much!!!
This is SO fun. Seriously wishing I had an older boy to make it for (mine's 1.) Definitely one of my favorites from the CSI party! Great tutorial and pics!
I am so confused. When I finished mine the dollar bill pocket was sewn together. What did I do wrong?
Maybe someone knows some good cryptocurrency wallet? I want to start working with cryptocurrency soon, but I can’t find a suitable way to store it yet!
Yes, cryptocurrency is very popular nowadays. If you are looking for a good place to store it, then I recommend you try Avalanche wallet. This way you will be able to store your cryptocurrency as conveniently and simply as possible, as well as use it when you need it! I hope my advice helped you, I wish you good luck!