I am getting ready for Addison’s Birthday party… in June. Maybe I’ll actually get stuff done this year!
Her theme this year that I chose (cause I still get to do that until she can start asking for stuff) is
Pink Lemonade
You might remember my inspiration post here where I picked out a whole bunch of fun pictures from pinterest! Oh how I love pinterest… I wish I wasn’t addicted but I am and I have accepted it! : )
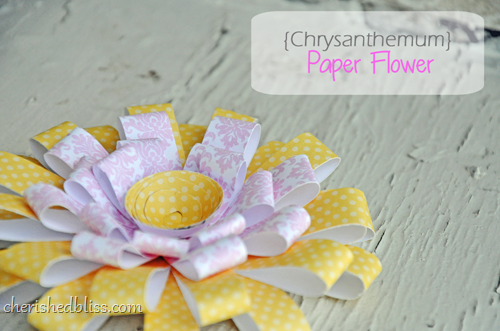
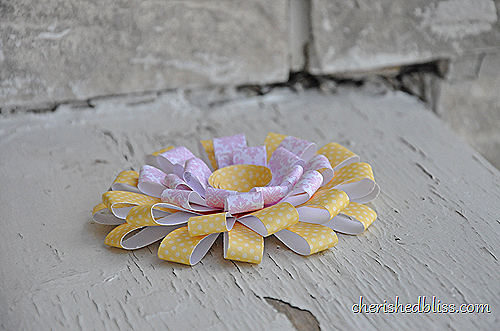
So today I am going to show you a paper flower that I made, I can’t tell you what it’s going to be used for because well, it’s a surprise! I can tell you it has a little something to do with lifestyle crafts! You’ll just have to come back in May and see where this lovely little lady will end up!
Don’t you just love these colors? This is pretty easy to make. Your kids might even love to make this with you, it’s pretty easy!
{What you need}
– 2 pieces of scrapbook paper
– scissors
– glue
– paper circle cut out
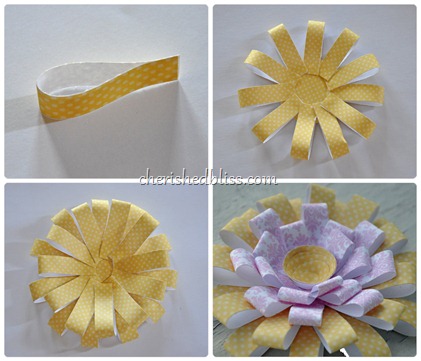
one. cut out a bunch of strips I started with the bottom yellow layer of strips at 3 1/2” x 1/2” but this depends on the size of the flower you want. Then fold it in half and glue the ends together. The first layer of pink strips are 3” long and the inner pink strips are 2 1/2” long.
two. Start gluing your paper strips around your paper circle cut out. Mine was approx. 1 1/2” in diameter.
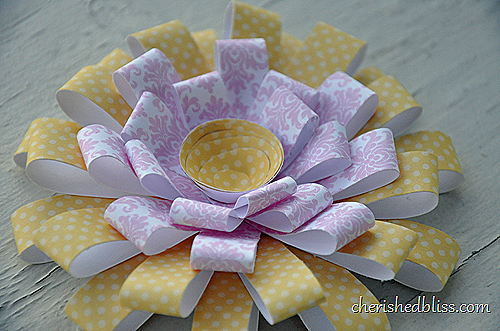
three. Keep going around with your different layers by filling the next layer in the spaces of the previous layer. I did two layers of the yellow, two layers of the pink, and then I filled in a few gaps with the pink in a 3rd layer of the pink (but this is only necessary if you fill you have a few gaps).
four. Add your center. For my center I took another 1 1/2” circle and cut it into a spiral then wrapped it around tight and glued it down in the center. You could also add buttons, rhinestone, or whatever suits your project
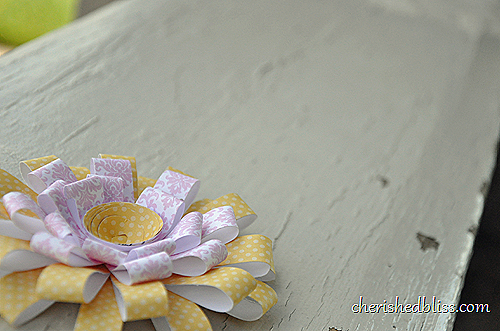
There you have it. A beautiful paper flower for embellishing all kind of projects!
Have a beautiful day!

and here

very cute Idea and you make it look so easy.
It's sooooo pretty!!!! The flower can be used to decorate soooo many things!!
Thanks for sharing at The DIY Dreamer… From Dream To Reality!
Oooo, so pretty! Love it!
This is so cute! I pinned it for later because I think I could actually do this. Thanks for sharing!
This is so cute! I just pinned it!!
Beautiful! This would make a great bow for a present.
Ashley,
These are darling! I love your paper choice. I'm pinning this!
I'm visiting from the Shabby Nest linky party. I hope that you can stop by my blog as well. :)
Thanks for sharing,
Laura
This is so pretty!! I would love for you to link it up at Fantabulous Friday#10 going on now! Linking up enters you for a chance to win free ad space on my blog for the month of May! Hope you'll swing by for a visit!
http://www.littlebeckyhomecky.com/2012/04/fantabulous-friday10/
HI – I'm stopping by via Tatertots and Jello. Fantastic tutorial – I have a stack of scrapbook paper just calling out to be used for this!
So pretty and the center just makes the flower stand out. Thanks for sharing at this week's BFF Open House!
What a simply beautiful flower! I love the colors you used as well! {Tammy}
This is so pretty, Ashley!
<3 Christina
Hi,
I followed you over from Happy Hour Projects. This is a beautiful paper flower with a wonderful tutorial. Thanks for sharing.
I would like to invite you to share this, and any other posts, on my link party at http://www.michellestastycreations.blogspot.com. Have a great weekend.
Hugs,
Michelle
Such a beautiful flower! The colors and the prints go so wonderfully together! Thanks for sharing the tutorial:)
Those are great!!! I love the colors!
I'm a flower fan, and these are great! Thanks for sharing. They'll look great at the party!
I love paper flowers and this is a style I have never seen before. It looks terrific and would be a great addition to gift wrap. I am stopping in from TheStuffofSuccess. Feel free to stop on by and say hello. Have a great week. Athena
So pretty! Thanks for sharing!
These look great! I want to make some paper flowers to stick on the wall of my little girl's room these would be great for that! Thanks for the idea. I would love for you to share this at my link party
http://thewinthropchronicles.blogspot.com/2012/05/share-it-link-party-9.html
That is very pretty and looks so simple to do. Hope she has a great party.
Hey there!! I just added myself to your followers for support, and wanted to invite you to check out an awesome Modcloth giveaway I'm having!
Hope to see you there! Thanks so much!
Emily
http://emilymmeyers.blogspot.com/2012/05/giveaway-time-again.html
SO pretty!! I can't wait to see how the party turns out!
I'm featuring this on Wednesday (tomorrow!) :)
Super cute – thanks for the instructions – I pinned it!
That flower is adorable…and so are you! <3
Finally a paper flower I can make! Thanks or sharing and for the upper clear tutorial! I bet that flower is going to look beautiful at the party, can 't wait to see how you use it!
Love these! Stopping by from Tuesday Time Out Linky Party that I'm co-hosting this month. I'm going to feature this on my page in this weeks party! So many possibilities for this craft- that's why it's so great! Insidemypresent.blogspot.com
I have a Japanese blog which introduces tips and ideas for craft lovers. Your paper flower is so adorable I definetely introduce it in my blog. : )
Thank you very much!! : )
Really cute flower! I’m always on the lookout for paper crafting ideas.
Thanks so much Ann! So glad you stopped by!
We’re a group of volunteers and starting a new scheme in our community. Your site offered us with valuable information to work on. You’ve done an impressive job
and our whole community will be grateful to you.