Build these Extra Large DIY Wood Lanterns with a few simple Worx tools. They are the perfect addition to your indoor or outdoor decor. This post was sponsored by Worx Tools as part of an Influencer Activation for Influence Central but all opinions and ideas expressed in my post are my own.
Do you guys remember how I talked about some new tools I received, the Worx MakerX tools? Today I’m sharing with you my tutorial for these DIY Wood Lanterns, information on how you can win some prizes and my favorite features and ideas that you can accomplish with these tools!

MakerX Tools
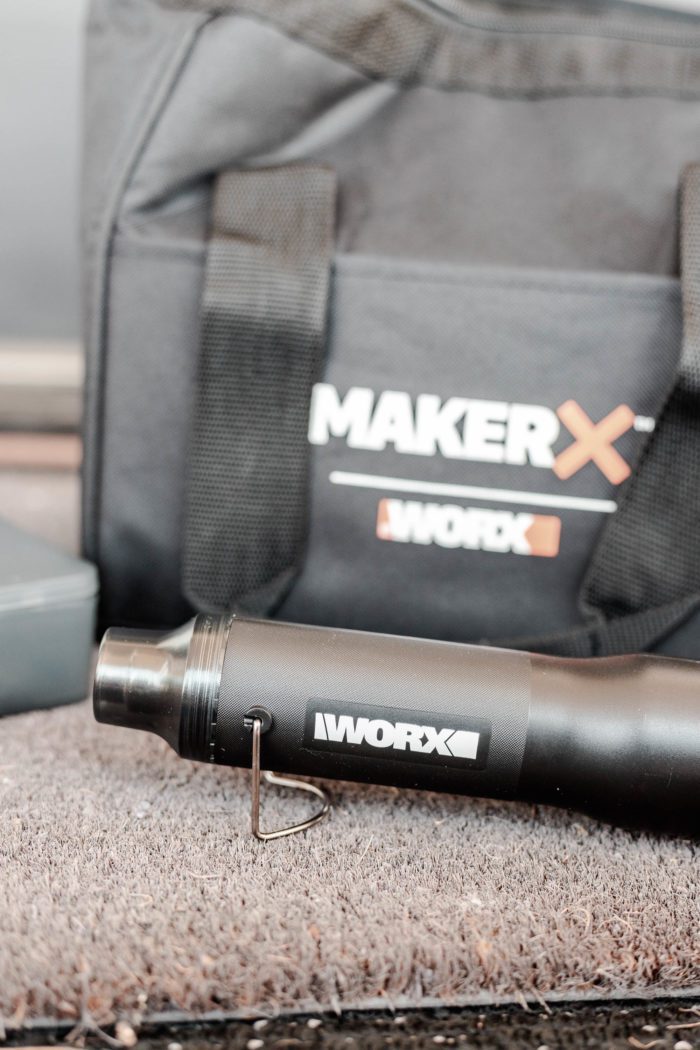
Let’s recap all the tools included in the MakerX Kit. MakerX is a system of portable, powerful, and precise crafting tools. It gives you the power you need all wrapped up in an easy to carry case that you can take anywhere! Here is what all is included in the full kit! It includes: The MakerX hub adapter, battery and charger, Airbrush attachment, Rotary Tool attachment, Angle Grinder attachment, Mini Heat Gun attachment, Wood & Metal Crafter attachment, and many additional accessories.


Now let’s put these to use and make some Extra Large DIY Wood Lanterns!
How to Make Large DIY Wood Lanterns
I wanted these lanterns to be super easy to make! They only ones one size of lumber, some thin metal rods, and a few Worx Tools!
Supplies for Wood Lanterns:
- 2×2 Boards
- Worx Miter Saw
- MakerX hub adapter, battery and charger
- Rotary Tool attachment
- Angle Grinder attachment
- Staple Gun & Staples
- Wood Glue
- Nail Gun & Nails
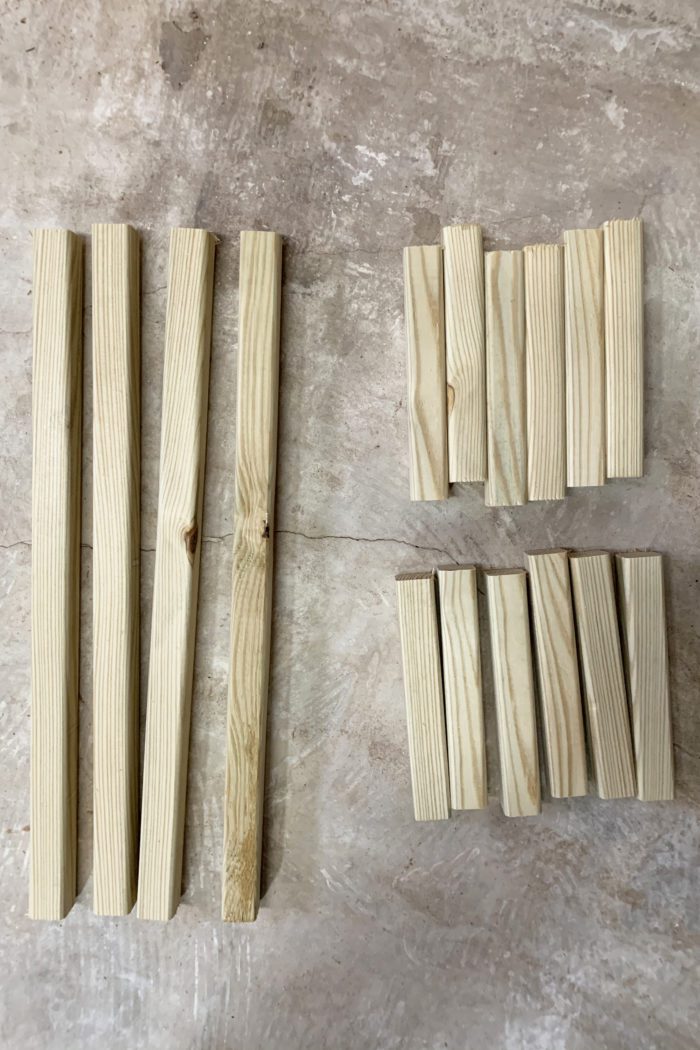
Cut 2×2’s to Length
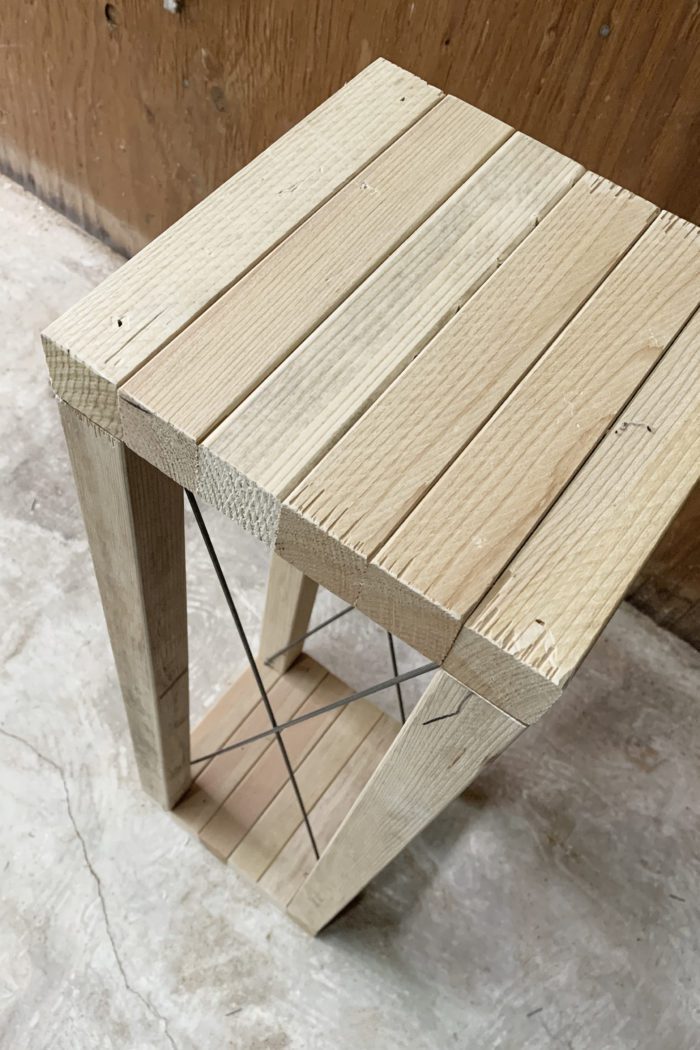
To determine the length for the boards needed for the top and base I measured the exact width of (1) 2×2, multiplied it be 6, and cut 6 boards to that length in order to create a perfect square, then repeated for the top (12 pieces total, 6 for the top, 6 for the bottom). Once those were cut, I cut (4) 24″ board to use for the vertical supports.
After cutting all the boards I used the Rotary Tool attachment with a sanding disk to remove any splintering from the saw and make sure all the edges were nice and smooth.
Use the Angle Grinder to Cut the Metal Rods
Before putting the lantern together we need to cut our metal rods to length. Mine came in 48″ rods and I needed them to be 24″, so I just cut them in half with my Angle Grinder and cutting wheel. Make sure you are using the proper safety equipment when cutting metal! If there are any sharp edges you can use the grinding wheel to smooth that out!
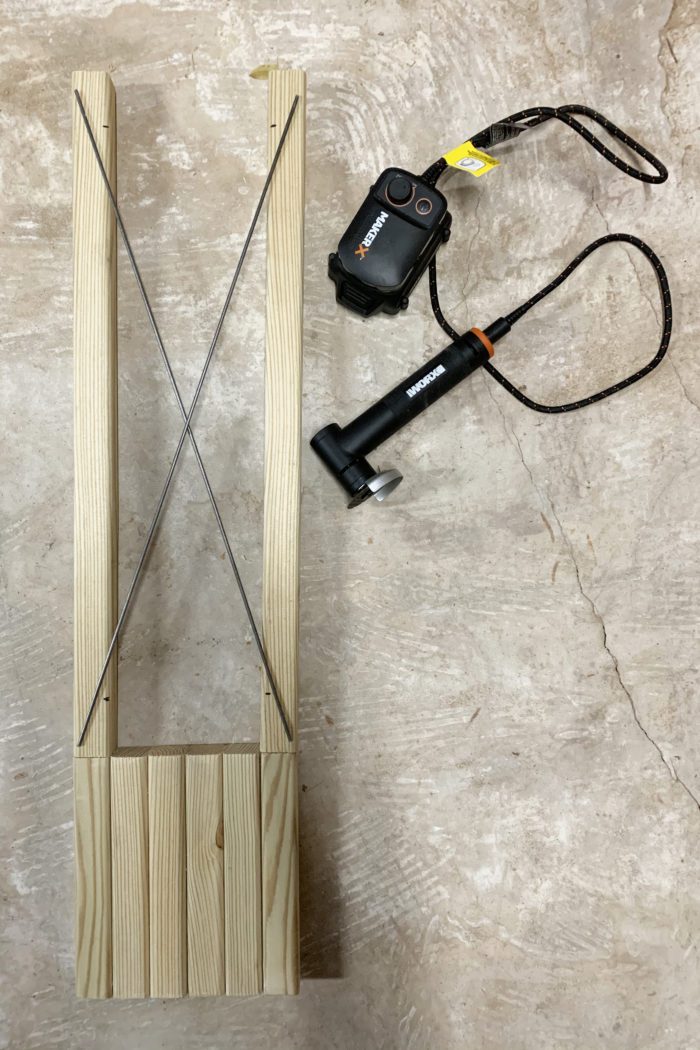
Then lay two of the vertical support boards to line them up with the width of the base and lay out your metal rods. Determine where you want them fall and mark where the metal rod intersects the edge of the 2×2. (mine was about 1 1/4″).
Assemble the DIY Wood Lanterns
Since I only wanted to use 2×2’s for this project the top and base will need to be assembled. I did this using wood glue and the nail gun making sure to keep everything flush and level.
Now it’s time to attach the metal rods. Lay them out on two of the 24″ boards, making sure to hold it in place so they intersect the edge of the 2×2 where you placed your marks, and using a stapler, center it and let the staples penetrate the wood on either side of the metal rod. Because it’s a staple holding the rod, this will give you a little flexibility to make sure the vertical supports can be lined up perfectly with the edges of your base.

Attach the vertical support pieces to the base using wood glue and a nail gun. Then line all the boards up and attach the top piece to the 4 support boards.
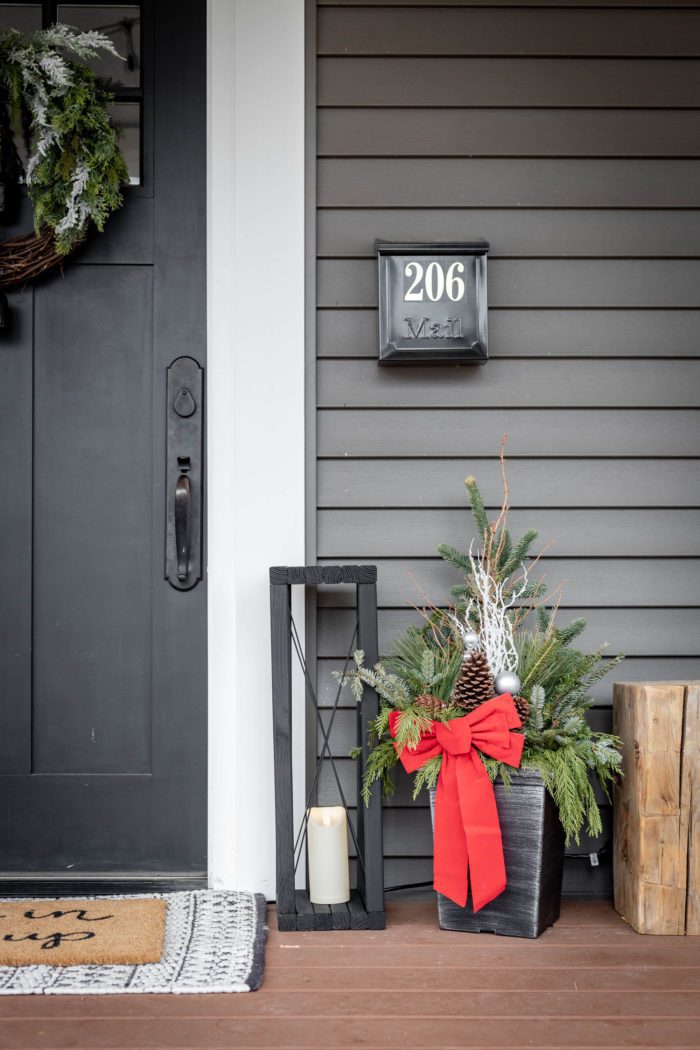
Paint the DIY Wood Lanterns
I was a little torn if I wanted to leave these natural or paint them black. My gut always said black and I think it really gives them a finished look, but you could totally stain them as well! These were originally meant for our front porch, however I set them down in my living room for a minute and looked over to realize they would look great in front of our fireplace too!
Where do you prefer them? Front porch or by the fireplace?

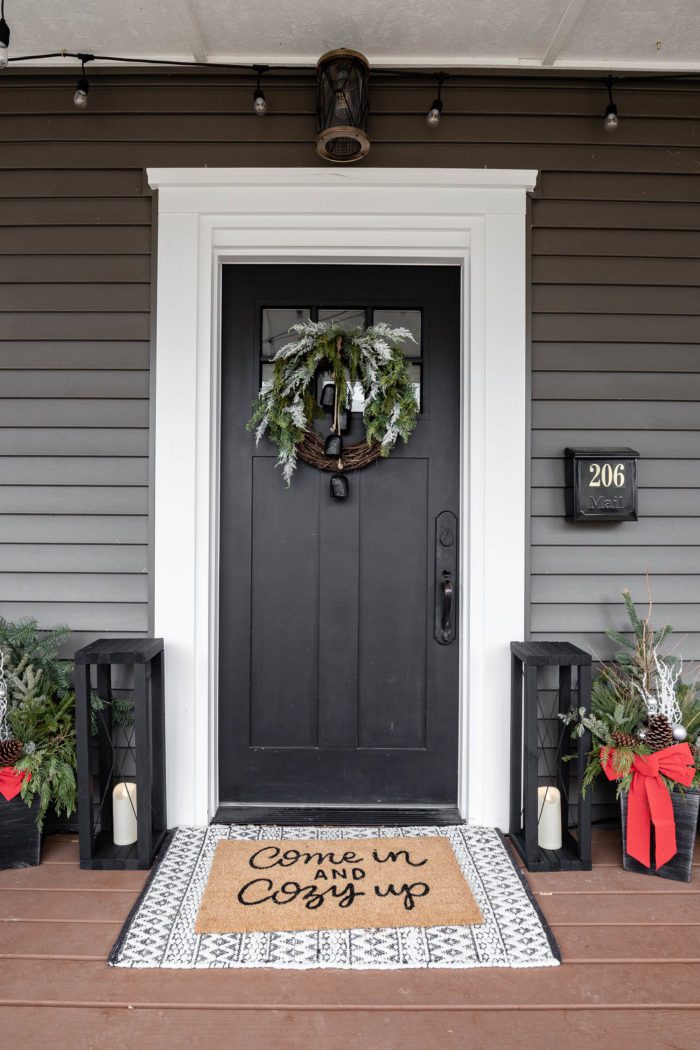
Since Christmas is almost over anyways I think I’ll put them on our porch because they will work for any season. But, maybe I’ll leave them by the fireplace until after Christmas to enjoy a little extra glow in the evenings!
These are super easy to make. It’s a great project to dip your toes into wood working. Even if you’ve never built anything, you can build these!

Not only do the MakerX tools make great gifts, it’s also a fantastic way to spend those gift cards you might be getting this holiday season! ;)

Power of X Contest
The Power of X Contest is STILL going on, it’s not too late to enter! Get your entry submitted before the contest ends on Jan. 8th and you could win up to $5,000.
Entering is very easy! Just use one of their new Worx MakerX tools to create an X-shaped project. Then share it to to either Instagram, Twitter or Pinterest with a short and sweet description and don’t forget to tag #PowerofX, #Contest and @WorxTools!
it’s really nice and meanful. it’s really cool blog. Linking is a very useful thing.you have really helped lots of people who visit the blog and provide them useful information.
Amazing
Nice Post
They turned out so cute! I have so many pieces of scrap 2x2s that I should turn into these lanterns as well! Thanks for the inspiration!
Those look amazing
lokking osm best french fry cutter
What a lovely DIY idea! Thank you for the tutorial!
Like many others people I also like wood as furniture and decking option. I have recently found this site https://www.buyafence.com/deck-building site useful for knowing different pros and cons about decking designing option for your project! By the way, I like your tutorial on DIT wood lanterns projects. Thanks for sharing!
Wow! That’s so amazing DIY project tutorial! I am really glad finding your different diying projects and inspired for having a try since your made more comfortable easier and simple to understand. I have heard wood fencing contractor at this https://www.napervillefence.com/woodridge-fence-company site- you could visit for knowing woodridge fencing projects. Thanks for sharing this post with us.
Good work i enjoyed
amazing DIY project tutorial! I a
Thanks for sharing [OmaarKing](http://www.google.com) article.
I’m so excited about this tutorial because I think it’s such a fun project and a piece you can incorporate into your home in so many different ways. The lanterns can be styled with florals, candles, or even some string lights. I love decorating with string lights so much, they add such an element of coziness. I have written a detailed article with the assistance of https://www.toppaperwritingservice.com/review-bestessay-com/ in this regard. I wanted to share with you some of my favorite ways to style your DIY lanterns!
The wife told me to check this out I’m glad you kept it attractive and simple she usually sends more difficult projects. She knows I’m good with wood Fence Company Flower Mound TX so it’s nice to get one that doesn’t take up a lot of time yet is still worth having around the house inside or out.
https://www.emorze.pl/eforum/viewtopic.php?t=288594
nicw work
Love the work here
nice work
Know the wood that you are working with very well before you begin your next woodworking project. You want to know the direction of the grain, the durability of the wood as well as how it will be affected by weather conditions and the tools that you plan to use. Knowing these things will help to have the results that you desire.rotary tool
masajistas
I play often to try to beat my score.