Would it be weird for me to tell you that I am already working on my Spring Mantel? I know the Christmas trees literally just came down (no judgement here if yours is still up, mine normally is too but my 18 month old monster decided he held off long enough, hehe). But, let’s face it… when you live in the frozen tundra and the holidays come to an end… all I can do is dream of melting snow and colorful buds peeking through! The mantel isn’t going to scream Spring just yet, but I am in the process of getting it together. You know how I like things to be multi-functional, this mantel will be no exception with a little before spring decor ; ) Ok… one paragraph in and I’m not even to the point yet. Let’s talk about the real reason you are here today, this DIY Mini Wooden Ladder Tutorial.

Now that we have determined I’m off my rocker and working on spring in the dead of winter, I’m also putting ladder’s on pianos. I should probably get out more, hah! But no really… I am totally in love with this little ladder. I mean it’s a miniature version of something big so it’s automatically awesome right? I’m not entirely sure of what I’m going to do with this ladder, but it will be on the piano and it will be adorable in all it’s mini glory, I promise!
So head out to the garage (or in my case run to avoid the negative temps) and let’s cut some wood!
Supplies:
– 2- 1×2’s @ 6ft (I used select pine because I had it on hand, but you can use the pieces that are less than a $1 if you want)
– Ryobi Airstrike Nailer
– Wood Glue
– Stain
– Paint
– Brushes
– Sanding Block
Cut List:
– 2 1×2’s @ 32″
– 4 1×2’s @ 12″
DIY Mini Wooden Ladder Tutorial
Lay out your wood and figure out the spacing of your ladder rungs. I’m pretty sure mine are about 5 1/2″ apart, but if you follow me on instagram, I’m typing this post up at a coffee shop (child free) and I can’t remember. But it’s not important… you just want each space to be the same amount. As you can see there is a bigger space on the very bottom. I think it’s approx 4″ space on the top and 7″ on the bottom… something like that : ) Like I said, you can use the really cheap 1×2’s on this project, just try your hardest to get the ones that are straight… sometimes that can take a while because these tend to be pretty twisted and bowed.

Next mark each where each rung will go with a pencil on each of your side pieces. Then, add some wood glue and using your Ryobi Nail Gun (which is awesome I tell ya!) put two nails in the end. You will want two, or it will pivot a little until the wood glue dries.

Nail all the rungs to one side first, then you can go and attach the other side. It’s important to make sure your rungs are all the exact same length… if they are a little off you can sand them down.

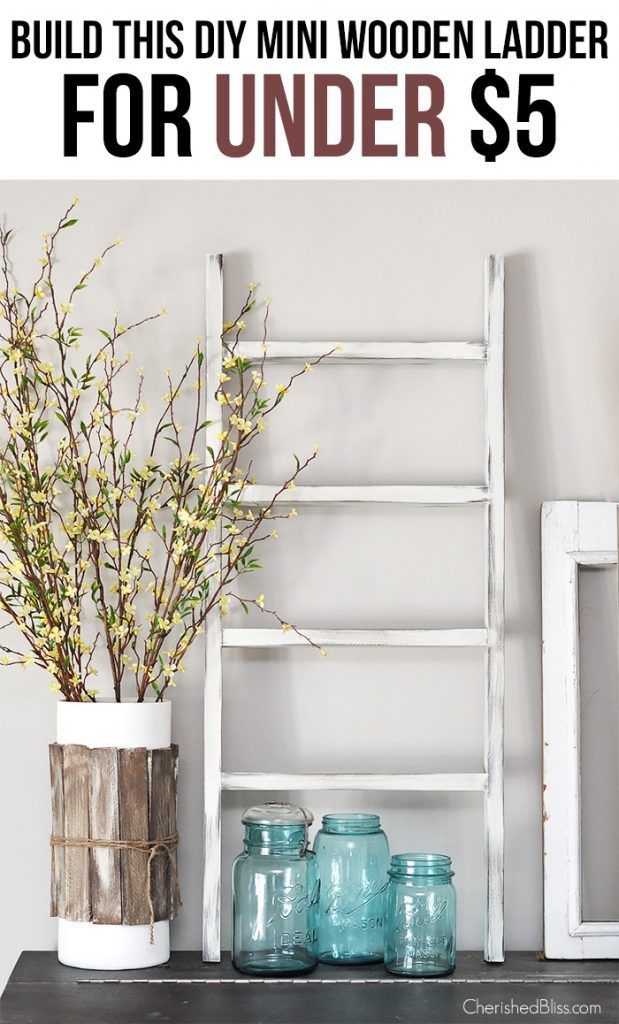
Once it’s all together, I put one coat of Minwax’s Dark Walnut Stain on the ladder and let it dry. Then using a dry brush, I barely dipped it into my Annie Sloan Old White (yes… I know… more white, my husband already informed me I’m falling farther down the rabbit hole) and dry brushed it over the stain, being careful not to full cover it. Here’s how it looked while I was painting, so you can see how I was leaving it a little streaky. This will dry super fast, and once it is, just hit it with your sanding block to blend it together and distress it where necessary. And when I say “hit it” I mean gently rub ; ) Unless of course you’ve had a rough day… best part of distressed furniture… it never judges you and your bad days, it fully embraces them with you :)!

Now just set it up where ever your heart desires… if it’s on a piano, well you kinda rock… but you can put it anywhere really. I think after it’s served it’s time atop my piano I will hang it on the wall somewhere!

Where would you put a mini ladder? Are you going to make one (cause you totally should), hashtag your projects with #CherishedBlissDIY so I can see.. I kinda love instagram, just a little FYI .
You might also like to try out my Weathered Wood Tutorial on this ladder.

And here’s some other projects you might like:


And of course you can always take a little peek through all my projects!
Have a beautiful day!
That is so cute!! I’m going to have to make one. Thanks for sharing it. :)
Thank you SO much Marti!! I would LOVE to see how yours turns out if you end up making one : ) xoxox
Adorable!! I have a piano I decorate too, so this would be perfect for on top of ours, too! You’re not crazy. ;)
Thanks so much Amanda! I think I’m going to have to make a few more of these! I’m a suck for mini things, lol! Would love to see if you end up making one! Have a great night!
Super super cute ladder! I can think of so many ways to use that in my decor! Visiting from 36th Ave. Have a great weekend!
Thank you so much Luisa!! Happy to have you stop by : ) xoxox Enjoy your weekend as well!
I love it! I also love your distressing technique–so simple :)
Thanks Angela! I’m all about the easy ; ) And anything I can get done in the few moments where my kids aren’t all over me, haha!
Love this. So simple but a great statement piece. Pinning!
Thanks so much Andrea! I am a big fan of simple projects: ) Thanks for sharing! xoxox
This is such a cute/simple decor piece. I love how you staged it too, with the blue mason jars!
Oh my gosh I absolutely Adore this idea and I would LOVE to do them in a future home. I am featuring your project over at my site I hope You enjoy!
So cool, but I think I will need to tweak the design a bit as I want to turn it into a pot rack for my sister. Thanks for the design and the inspiration!
Love this idea and appreciate the great tutorial. Pinned to share and refer back to because I think my mantel needs one of these!
This DIY project is a must. I think this mini ladder design would be perfect in every living rooms. With some jars and some figurines these design will surely capture attention of every visitor or guest.
I am pretty sure you can find good solutions for all your ideas on WoodPrix page :)
Thanks for this wonderful post! It has long been very helpful. I wish that you’ll carry on posting your wisdom with us https://www.cesspoolsonlongisland.com/services/sewer-line-video-inspection-long-island-ny
Thank you for this Great and informative site! https://www.snowplowing-syracuse.com/
This is such a great resource that you are providing and you give it away for free. https://www.paintinglongisland.net/services/exterior-painting-long-island-nyc-ny
Watch Indian Dramas on <a href=" https://sasuralsimarka.online/ Bigg Boss 16 watch online