This is a sponsored post written by me on behalf of Frigidaire and Lowe’s. All opinions are 100% mine.
When I first remodeled my kitchen one of the biggest things I wanted to change, but wasn’t able to at the time, was the cabinet next to the stove. It’s an awkward cabinet that causes pans to not sit on the stove correctly, and it was a magnet for food splatter. I wasn’t sure what I was going to do with it, but I did know that in the future something would have to be done! After lots of convincing my husband, we finally decided it was time to make some adjustments since we would be having our new Frigidaire Professional Convection Range installed by Lowe’s. We didn’t want anything to prevent the use of our new range so we cut the cabinet in half.
I actually thought of doing this the first round of remodeling, but then it presented the problem of the upper cabinet being to short so we decided to wait. I’m a fan of symmetry so it wouldn’t work for me to leave it as is. Today I’m going to share with you how I altered both of these cabinets to get the look I was going for!
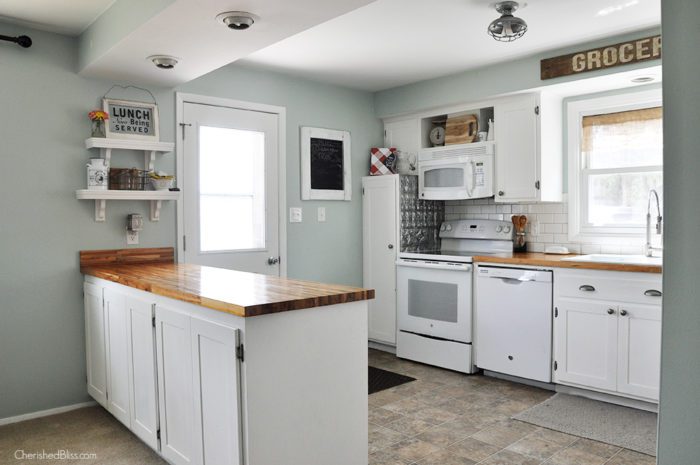
Here’s the before:
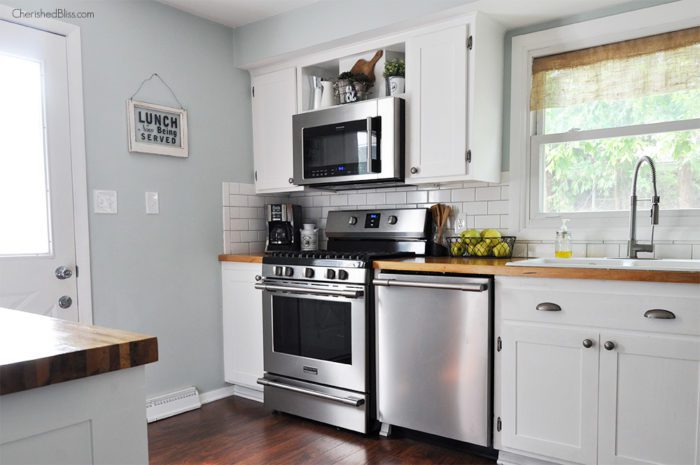
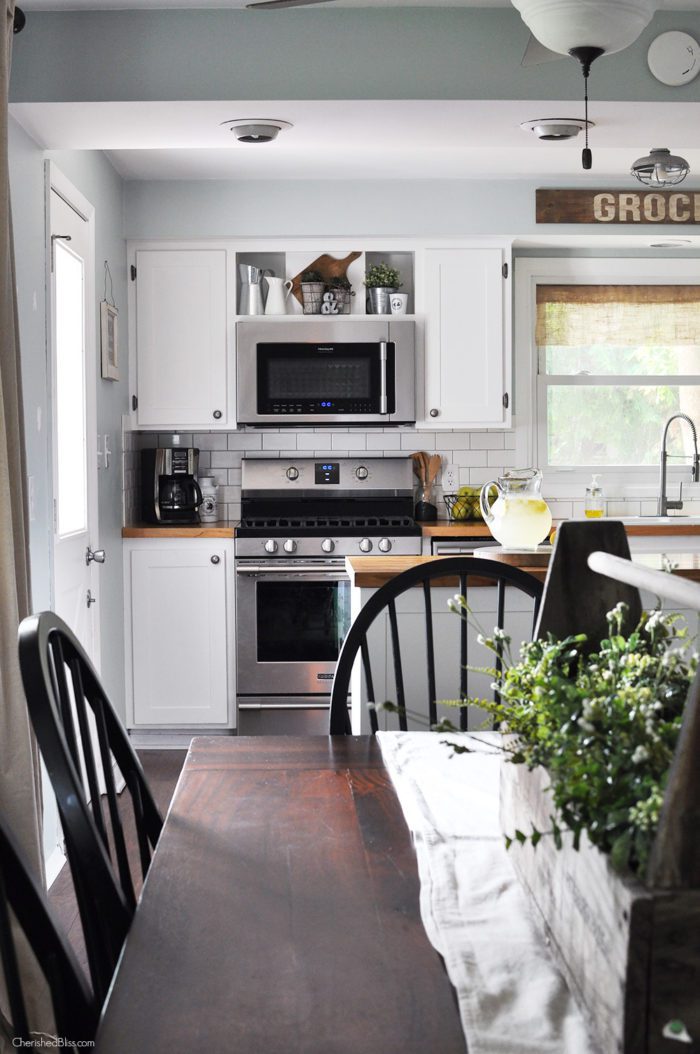
And the final result:
It’s amazing what that little bit of counter space has given us. It has made cooking on our new range more enjoyable and provided me with additional space while cooking!
To accomplish this, you will need a few tools.
Supplies:
3/4″ Plywood
Circular Saw
Multi Tool for cutting hard to reach areas
Sander
Drill or Impact Driver
Kreg Jig
Wood Putty
Finish Nailer
Wood Glue
How to Alter Kitchen Cabinets:
Before we get started, I just want to say that each cabinet will be different, and you may need to adjust the process to fit what needs to be done for your cabinet. This process does also require a basic understanding of how kitchen cabinets are put together. Please do not try this if you are not comfortable making these adjustments!
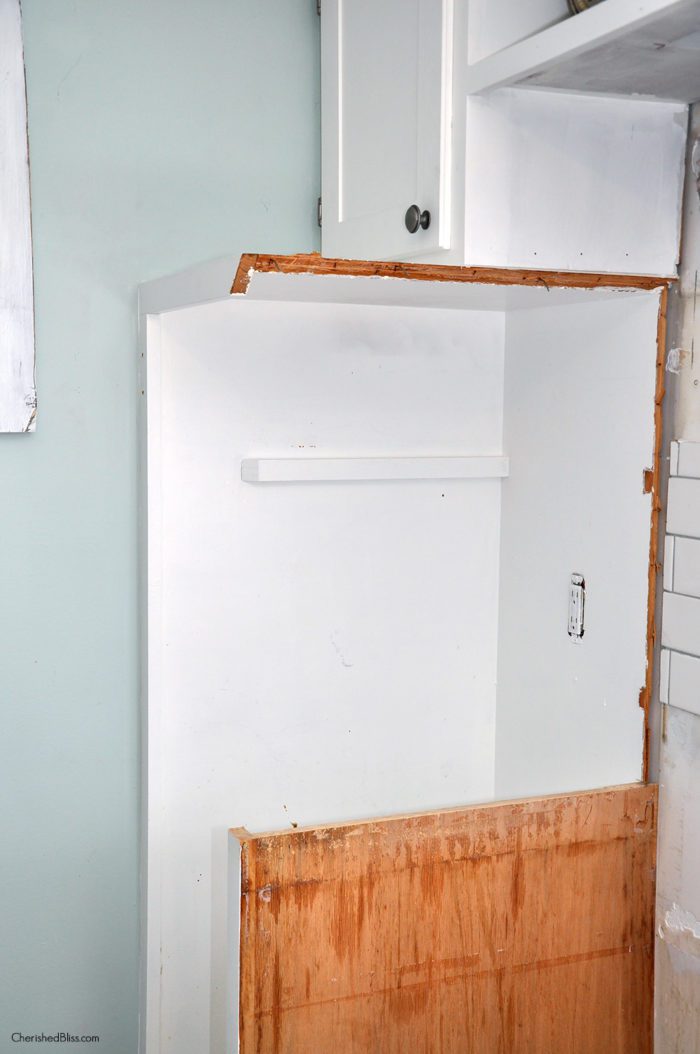
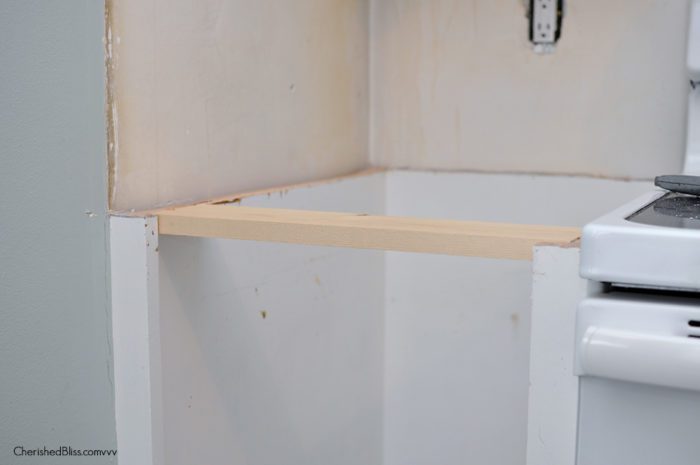
First we moved our appliances out of the way, and prepared to make the first cut. I started on the right side of the cabinet. I used the circular saw for this part, and in order to keep a straight line I used a 1×4 as a fence. I just leveled it where it needed to be based on the height of the other cabinets, and attached it with screws. You will want the fence above where you are cutting because that part is coming off anyways. Do NOT put screw holes where the actual cabinet will remain!
Once I cut as much as I could with the circular saw, I had to use my multi tool to get the corners. Then I was able to remove the right side of the cabinet wall.
We continued cutting around the 3 remaining sides at the same height with the circular saw and multi tool, then we added a brace to the front of the two side walls. When measuring for this piece we were careful to make sure everything was square. Once you remove everything there is nothing keeping the front edge of the side walls from pulling inward, so it might need to be pushed out slightly or pulled in. We measured the back and then made the brace that same size so that the back wall and the front opening were the same width. Then before you attach it, make sure you are all squared up.
We attached the brace with pocket holes using our Kreg Jig. Then I just needed to add an extra piece of face framing across the top. We attached it with wood glue and brad nails. Once we were finished framing it out, we attached our countertop to the top of the cabinet and added the door. We did have to build a new door to fit the new height of this cabinet.
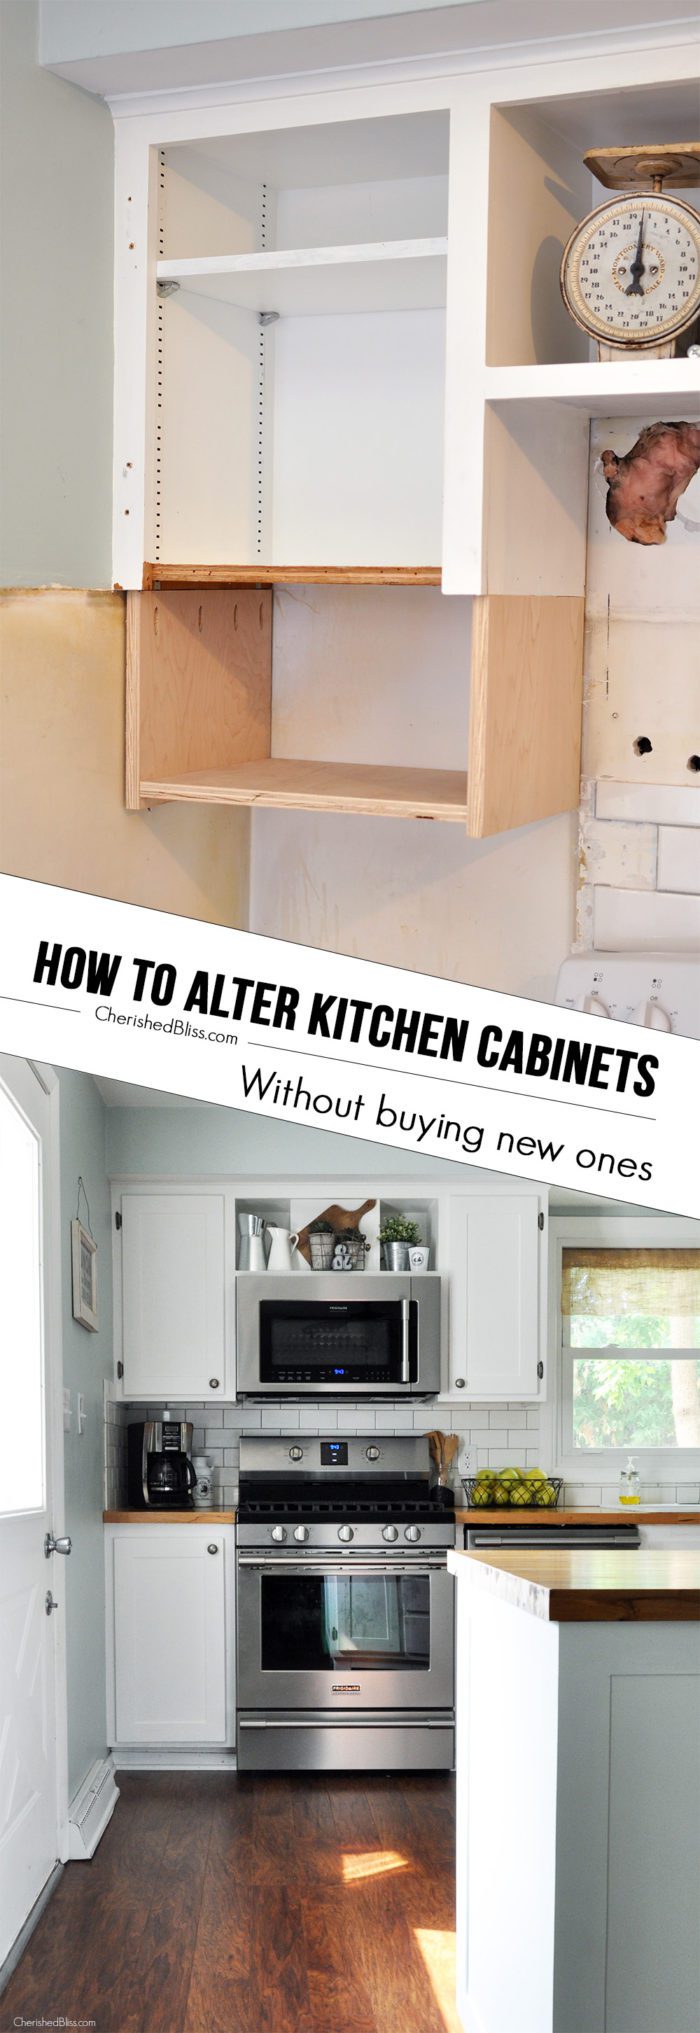
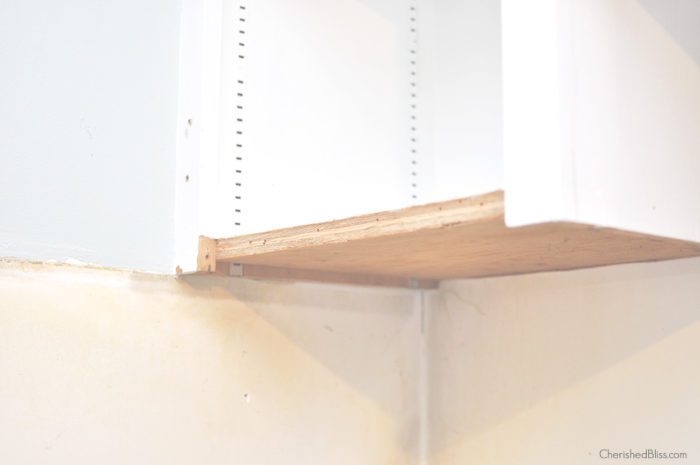
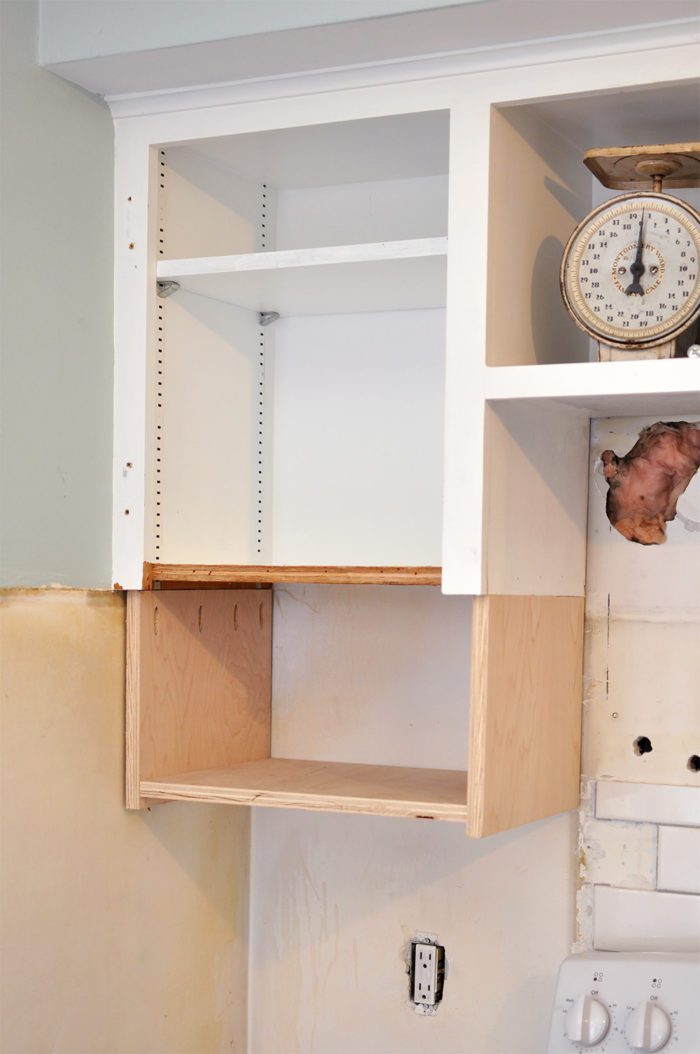
Then it was time to fix the upper cabinet. I need to extend it down without replacing the whole thing. So I took measurements and built a three-sided box to extend it down to match the cabinet on the opposite side.
After I got my pieces of plywood cut, I added pocket holes to attach to the existing cabinet. For the bottom of the new cabinet extension I attached it to the sides with pocket holes and wood glue.
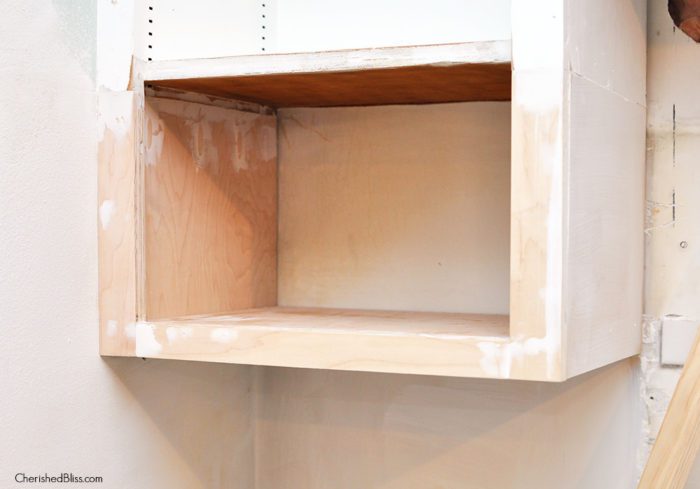
Then I had to rip down pieces of plywood to get the same size face framing, and attached with wood glue and brad nails. These were obviously custom cabinets because everything is a different size, so that took a little extra time. Then use wood filler for all the nail holes and gaps.
Once your wood filler is dry, sand the cabinet down and prime and paint using this tutorial.
Then we just had all the little finishing projects to do, like caulking and extending the backsplash. We also cut the previous tall door in half to fit on the top cabinet. All in all though I couldn’t be happier with the finished product. It has given our kitchen a whole new look!
Be sure and check out more details of our Industrial Farmhouse Kitchen!



You’re amazing! I don’t know how you think of this stuff. Did you move the island too? I couldn’t tell if I’m going crazy or if it’s in a different place in the before/after pictures.
It looks so much better! What was your total cost?
Wow! Awesome job! I makes the space look so much more even and symetrical. Good for you!
You did a fabulous job. I have the same exact issue as yours!!! Now I have something to show my husband so he can visualize how this whole process will work. I think we can do it on our own, although we don’t have all the tools you mention. Thank you so much for sharing!!! Found you on Pinterest! ;-)
That turned out awesome! Your after pic is what it should have looked like when the original builder finished. That was a really odd shaped cabinet. How do you like your Frigidaire convection oven?
I love your kitchen, mine is very similar. I have a question. I was wondering about the cabinet above your stove? Did you somehow enclose the vent that releases the air to outside? If so how did you do it? I would like to do that to my kitchen, that is one reason I keep the doors closed is because of the vent.
Hi Leah, I actually didn’t, it was already like that. I would think you could just build a box around it. You wouldn’t even necessarily have to attach it, if you could just use it like a room divider. Thanks for stopping by, hope that helps a little!
Absolutely love the kitchen remodel? How much did you cut off from the existing counter? How big is the island now? How much space did you leave around the island for your walk through? Would love to do this in my kitchen but don’t know if I’ll have enough room? Thanks in advance for your help????
Hi,
I really like your post!
You have shared the important aspects here.
The greatest advantage of accomplishing this is you can get what you dreamed of, a brand new kitchen. However you might possibly switch around your kitchen by modifying your floor covering, upgrading a few cupboards, and even changing your kitchen counter tops, your kitchen may not seem to be any different if you’ve kept the same kitchen design. If you’re looking for the quintessential method to obtain a completely new kitchen, without needing to buy a new house, you may also need to improve your kitchen paint or wallpaper, the window treatments, as well as your kitchen and also potholders
Thanks for being sharing!!
Keep it up..
Regards
Audrey G. Crabb
Thanks for saying that you prepared before you started. My sister always tries to do projects without much preparation. I’ll need to ask a professional for different tips that I could give her so that it is easier for her.
The symmetry looks fantastic. You did a great job.
Not awesome, you didnt explain resizing the door. The door is th most important part as that is the price everyone’s ans uses.
I know this is an older post but I was wondering what type of hinges you bought?
hi Ashley! Thanks for the post! It’s very helpful as I’m looking to do something similar in my kitchen. One question – how did you resize the cabinet doors? Thanks!
It really looks amazing. Can you tell me how you choose the cabinet doors?
Love this. Great information!! Thank you!
This is awesome. Thanks for the creative information.
Helpful information! Thank you!
Awesome article! Thanks for sharing!
I love this! And you would never even know that this wasn’t how your kitchen was originally built. I’ve been wanting to do a full kitchen remodel for ages, but never had the budget to buy brand new cabinets for the setup I wanted. It might take a lot of work on my end, but I would love for it to turn out similar to how yours did. Thanks for sharing!
TeachersBadi is a website dedicated to education, students, and teachers.The name ‘TeachersBadi’ reveals the nature of the site. A dedicated Team for teachers, students, and educators is launching and running the site. teachersbadi.in We enjoy sharing primarily educational material and employee and teacher-related content in the educational area.
thanks for share good article
PM Kisan Status