A couple of weeks ago I shared a tutorial on our DIY Farmhouse Style Writing Desk, and I got a lot of questions on how I finished it. One of my favorite parts of building furniture is the finish. It’s the details that make a piece whole, it’s the details that tell the story.
This was a fun piece to finish with quite a few layers, but it comes together fairly quickly. So let’s get started!
Supplies: (some affiliate links below)
Farmhouse Writing Desk (tutorial here)
Minwax Special Walnut Stain
Latex Paint – Sherwin Williams Urban Bronze
Minwax Jacobean Stain
Paint Brush
Lint Free Cloths
Steel Wool
Sander
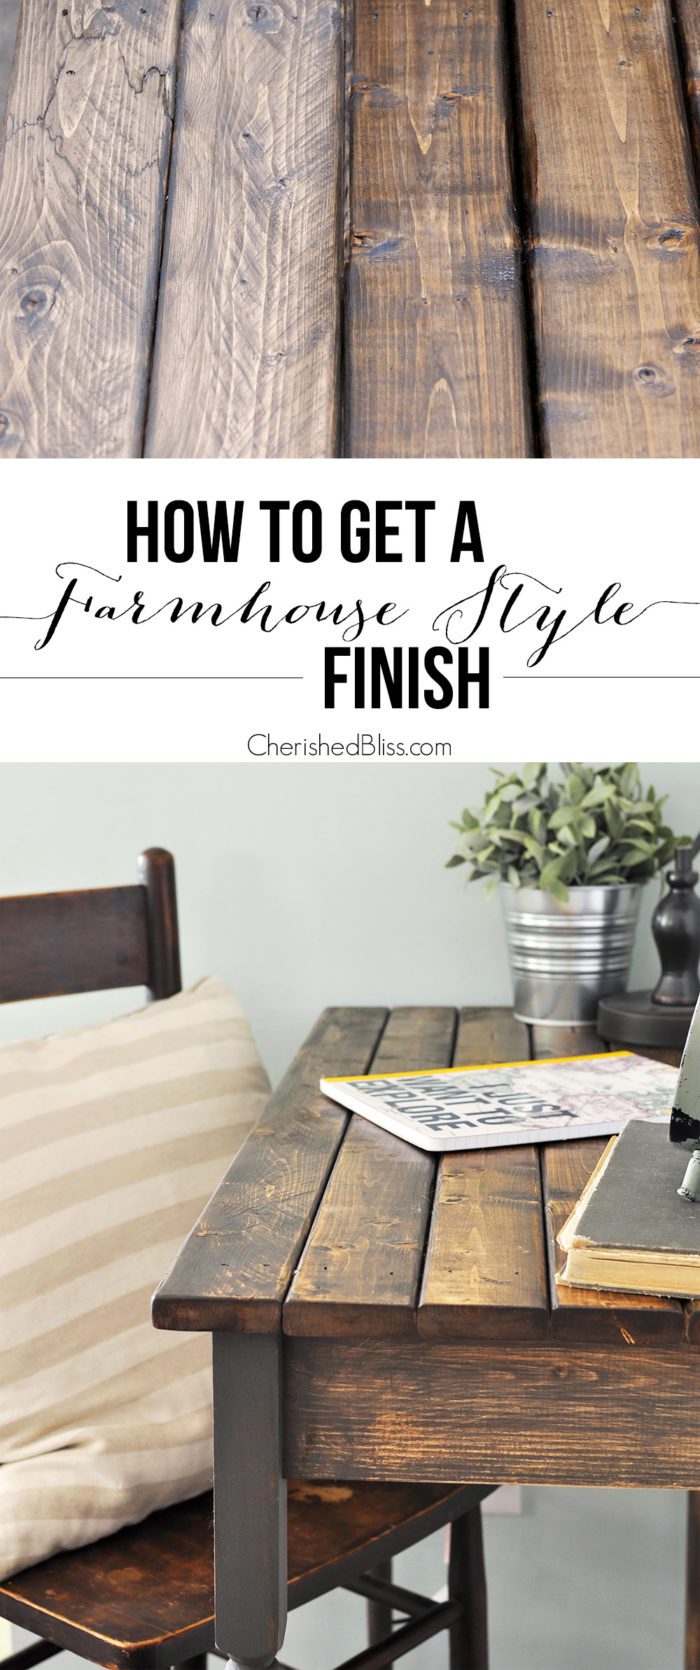
How to Get a Farmhouse Style Finish
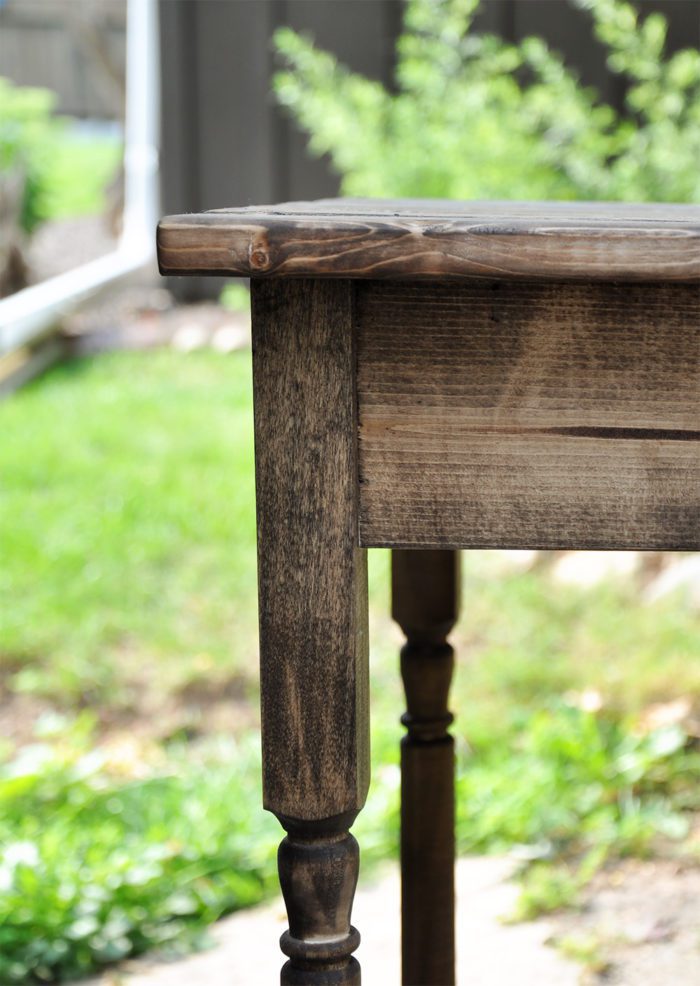
I started the process by staining the desk with the Minwax Special Walnut. I decided to apply the stain by rubbing it on with a lint free rag, giving it a hand rubbed look.
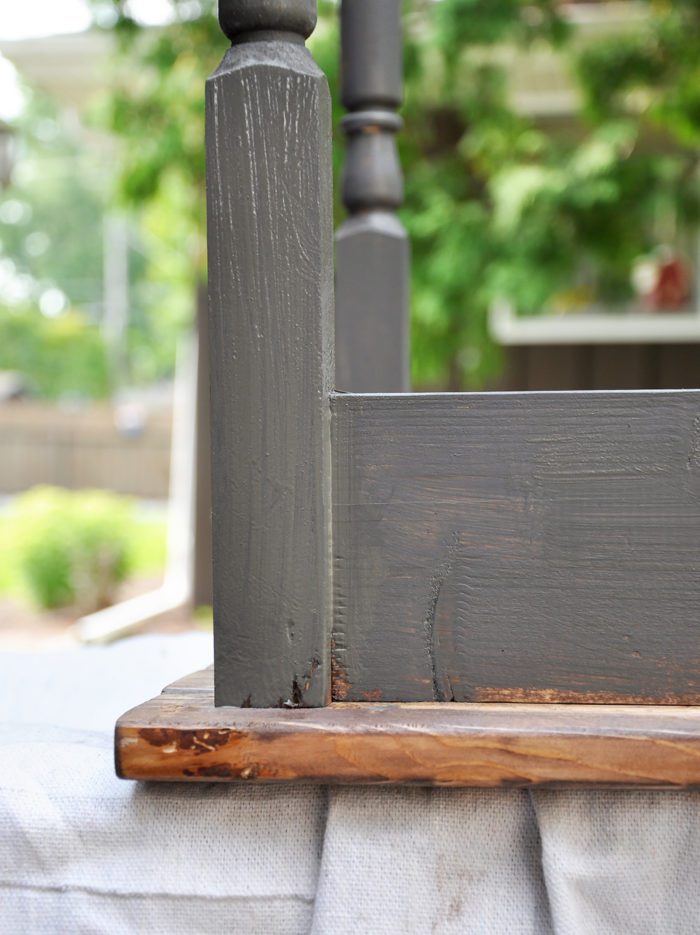
After allowing the stain to dry I painted the base of the table with the Sherwin Williams Urban Bronze. I wasn’t too particular about covering every square inch, since some of the paint will be removed during the sanding process.
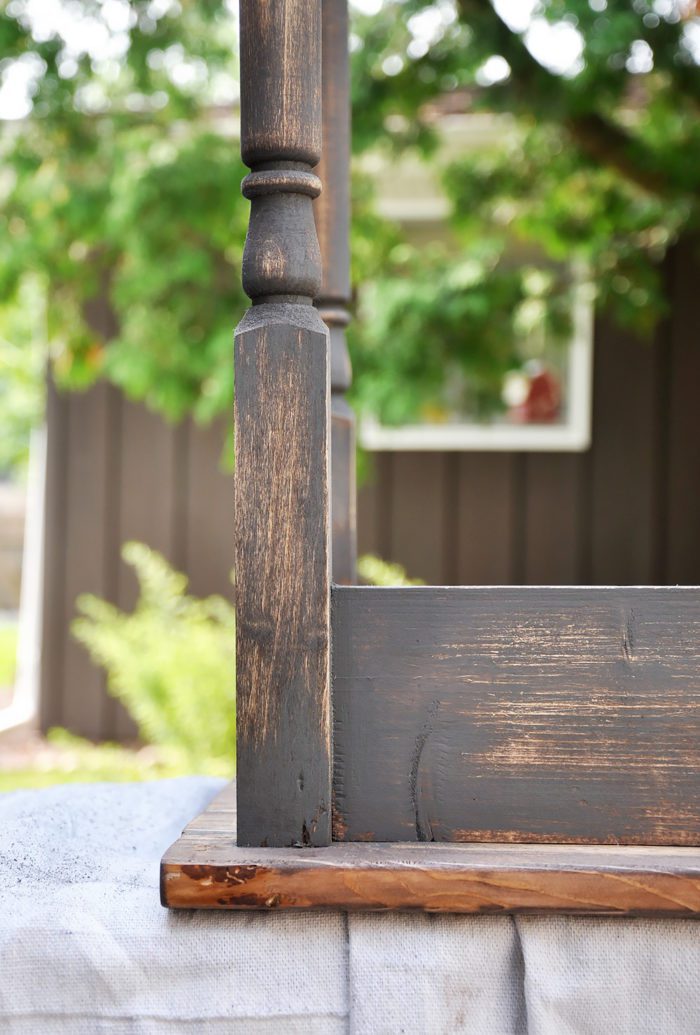
I let this dry to the touch. I like sanding paint that hasn’t fully set because it allows the paint to roll off a little easier and give you that distressed look. I sanded with steel wool first. It’s a slightly different look than sanding with sandpaper. It’s just a personal preference… remember, I like the details : ). But if you want to use sandpaper, go for it, it won’t ruin the project, I promise.
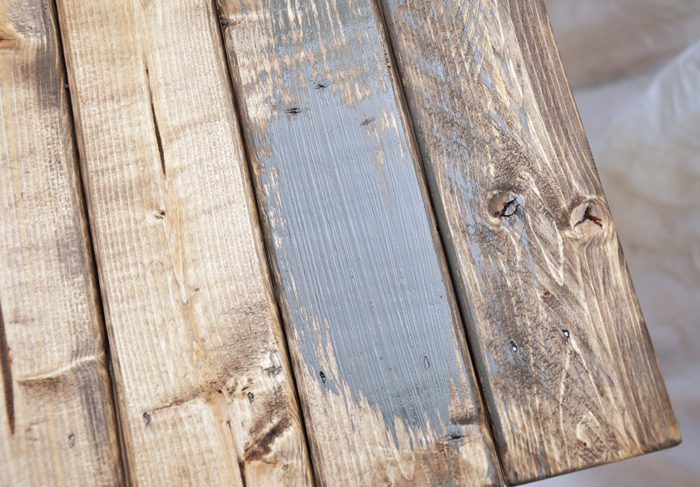
After I sanded the base, I let that dry, and flipped it over to work on the top. I wanted to add some gray to the top, so I dry brushed the paint on and immediately wiped it off with a damp rag. This allows the paint to get down into the cracks and grooves without overtaking the stain. In the picture below you can see how it affects the wood.
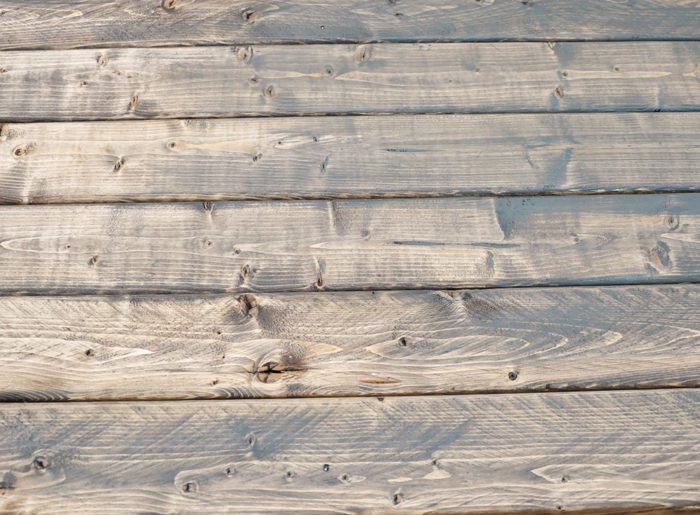
Here is what the top looked like at the end of this step.
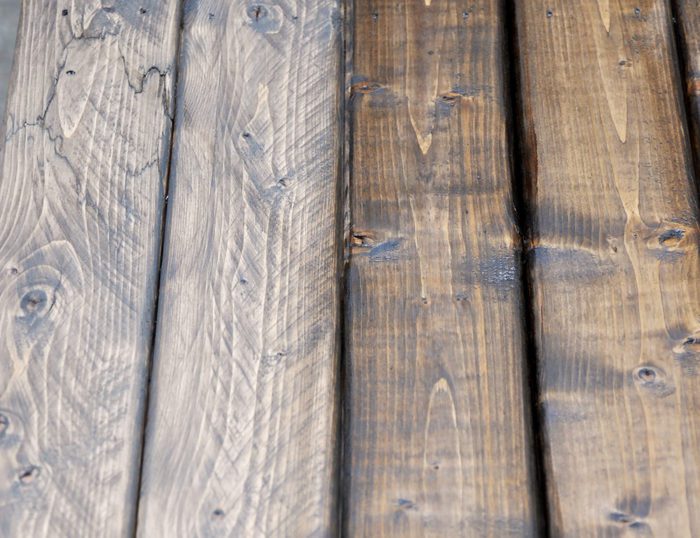
After letting the top dry, I felt it needed a little more warmth, so I used my Minwax Jacobean Stain and applied a thin coat to the top using my lint free cloths. You’ll want to do this quickly and very lightly. It is a dark stain and will take to the wood immediately. The best way I found to do this was to put a small amount on the rag and spread it thinly. This also gave it an inconsistent look, which is what I was after.
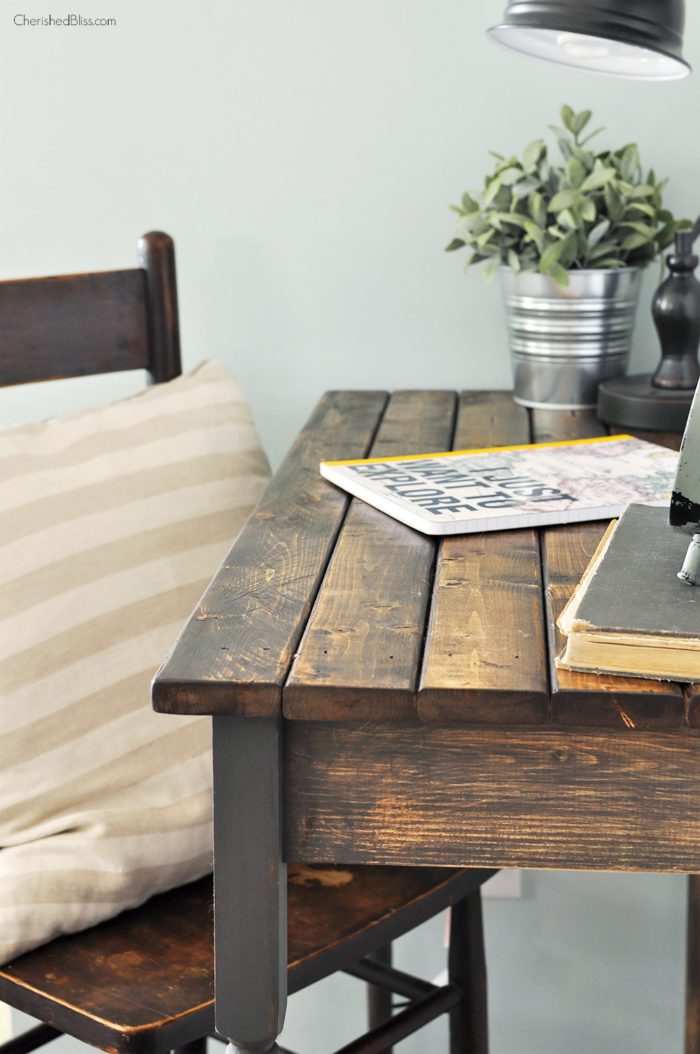
Once everything was dry it was time to add the “wear and tear” look so I used my sander to distress the edges of the top, the legs, and anywhere else that felt natural.
I decided to go with a clear wax sealant, which I applied with a lint free rag following the manufacturer’s instructions.
This technique is pretty similar to my weathered wood tutorial, so once you get the hang of it you can apply it to any piece of furniture or wood you want!
Please note: This type of finish is meant to go on raw wood, if you are wanting to do this on a piece that is already stained, the process will be slightly different. It will probably look a little different, but I’m sure it will still provide the same general affect.
What piece of furniture will you be finishing? Be sure and tag any projects with #cherishedbliss so I can keep up with what you guys are doing! : )

Looking for more DIY Projects? Check out some of my other tutorials….

I always have such trouble using stain, but you made it look effortless. All the steps you took really gave the wood a fantastic finish.
I love this farmhouse table! I hope you’ll link this project up as well as all of your other furniture makeovers with Friday’s Furniture Fix! Doors open every Thursday at 9PM EST and close on Monday’s at 11:59PM EST. Hope to see you there! http://thirtyeighthstreet.blogspot.com/2015/09/week-7-fridays-furniture-fix.html
Brilliant tutorial! This is the best technique for aged wood I’ve seen! I really enjoy your work and I would be so happy if you would share this at my Making broken Beautiful party this week! I would be honored if you would help to make this party grow :0)
Smiles!
Terry
http://thecuratorscollection.wordpress.com
Thank you so much Terry!! : ) xoxoxo
Hi Ashley, I read your very nice tutorial about finishing the farmhouse desk. I was wondering, after painting and staining you said to sand to distress but how do you do that effectively without exposing the natural wood on the edges and corners. I love the distressed paint look but seem to sand too much and have to go back and add dark stain to those areas again. Any advice is appreciated. Thanks!
Love the table but I have one question. I have refinished lots of projects and was always told not to use steel wool with latex paint because the fibers in the steel wool would rust with a water based paint. If you are aging something this probably would not be a issue. Have you had this problem?
I have used stain only to get similar affect on kitchen table where wear is big factor.
1:Fruitwood- Minwax, 1:Clasic Gray- MinWax, .5 Natural- Minwax, .5 Gel White – Old Masters. The gel white is the key.
You could easily warm this up with a last coat of Fruitwood.
I did three coats on table then polyurethane.
You indicate you used gray paint. What brand, color? I’m assuming flat? Looks great!
What is the wax sealant you used?
Hi there! Do you have any tips on redoing outdated already stained, dark wood furniture to this kind of look? :)
What was the name of the clear wax sealant you used???
hi! I am in LOVE with this table and am thinking about doing it to a table I just bought. My table is a light oak color but real wood. Do you think this process would still work?
I’m assuming all the products were either oil based or water based. In other words, you can’t mix the two, right?
Hi Ashley,
My granddaughter is getting married Nov 4th. I would like to build her the farmhouse table for a wedding present. In looking at your website you offered to send plans for this table. I would appreciate it if you could send me these plans. Could probably build it from the picture but would be a lot easier from a set of plans.
Thanks a million
Bill
What clear wax sealant did you use? I’m new to the whole wax sealant thing. I’m planning to do your technique on wood shelf for my kitchen windows, so should I use a wax sealant for it or do you recommend something else. There will be a lamp and potted plants on them.
Hi Ashley, I love your blog. I’m new to DIY and I am going to try this technique on a table I bought recently for a friend. Thanks for sharing. I also signed up for new posts.
Great article and interesting, thank you for sharing.
What type of wood do u typically use
Loved this tutorial. You totally inspire me and I’d love to share my most recent project with you!
What was the name of the clear wax sealant you used? Your table looks amazing!
Quickest Hotmail login instructions
Just wondered if you have ever used a minwax color other than dark walnut? We’re building a home and I have used minwax provential on knotty pine in our bedroom. I love the weathered wood look and am thinking about doing that in our bathroom. Just wondered if you would get a totally different color with provential.
Hello. https://jayrims.co.uk/
Thanks for this amazing post https://www.alltechdownload.com/
Excellent article thank you so much
Your article will be useful, and the content is excellent. I have read many articles, but yours left a lasting impression on me; thank you for sharing.
https://www.simple-mehndidesigns.com/
I was looking to buy furniture with farm house style finish but the site which sells such furniture design was not working here. So i used VPN which i bought from https://www.1vpn.net/vpn-deals/surfshark-vpn-coupon-code/ , and it really helped me to access the website to order the farm house style furniture.
Sim cards have been around for a while now and they are still popular. They allow people to keep their phone numbers and contacts separate from their other devices. People can also use them to clone their phone numbers (https://www.ussdcode.in/blog/how-to-clone-a-sim-card/) so that they can have multiple phones without having to buy new phones.
Do you want to clone a sim card with only the phone number? If so, this tutorial will help you out. First, you’ll need a sim card reader and your original sim card. Next, follow these simple steps:
1) Insert the sim card reader into your computer’s USB port.
2) Launch the software that came with the device.
3) On the main screen, locate and select “Copy Sim Card Number”
4) Type in the number of the SIM card that you want to clone and click “OK”
5) On the next screen, make sure that “Clone Sim Card Completely” is checked and click “OK”
6) The cloned SIM will now be stored on your computer.
juno to the post and good situs slot online
good website massage bali