Happy Monday Friends! If you are here visiting from The Happy Housie, WELCOME! I’m so excited to have you here! I’ve teamed up with some amazing ladies to share some fun summer decor tutorials with you!! Make sure to scroll through the whole post and at the very bottom you can continue on in this fun little loop and see what tutorial is next! But before you go, here are the free plans for this DIY Kids Outdoor Table!
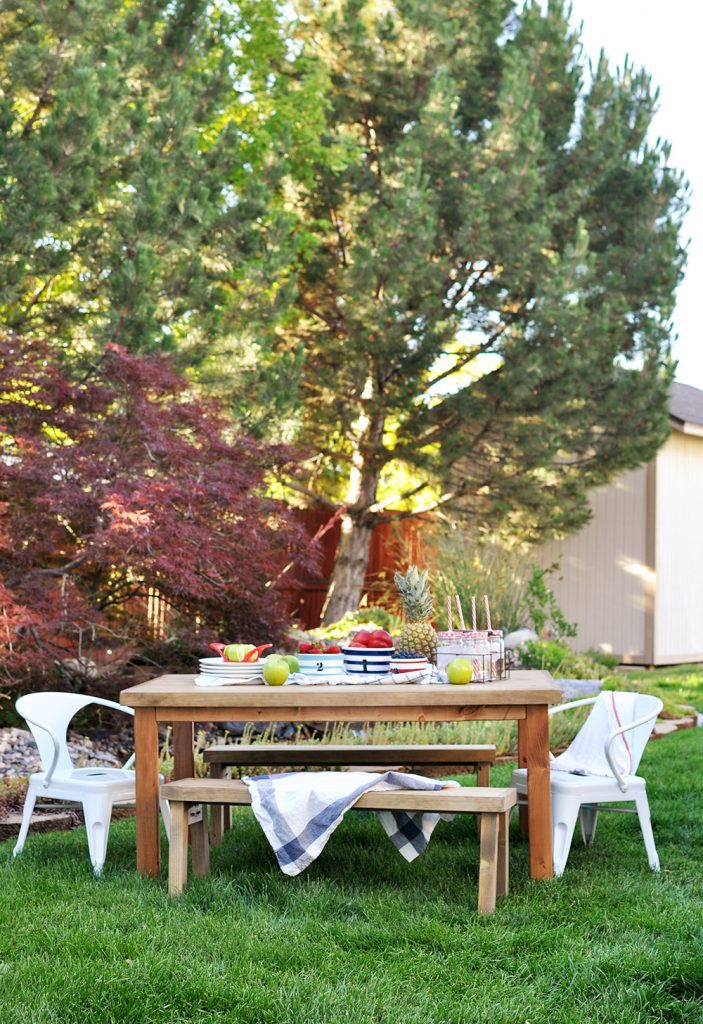
I’ll be sharing the free plans for the benches in a few days, so make sure and sign up to get our posts straight to your inbox so you don’t miss out!
But let’s talk about this DIY Kids Outdoor Table a little more and how you can build it! This post contains some affiliate links for your shopping convenience!
Supplies:
- Miter Saw
- Kreg Jig
- Orbital Sander
- Drill
- Minwax Special Walnut
- Minwax Weathered Oak
- Minwax Spar Urethane
Materials:
- (3) 2x3x8
- (2) 1x10x8
- (2) 1x2x8
Cut List:
I always suggest cutting wood as you go. Lumber can always vary slightly, and it’s better to cut right the first time!
- 4 – 2×3 @ 22″
- 2 – 2×3’s @ 39 1/8
- 2 – 2×3’s @ 23 3/4″
- 3 – 1×10 @ 45″
- 2 – 1×2 @ 46 1/2″
- 2- 1×2 @ 27 3/4″
Please always use caution when building furniture! Take all safety precautions using safety goggles, hearing protection, and anything else necessary and/or suggested by the tool manufacturers. Myself and Cherished Bliss, LLC cannot be held liable for any mistakes or misuse. If you have any questions, please consult a professional. By following this plan you agree to accept full responsibility for anything that may occur from building this piece of furniture. This plan is owned by Cherished Bliss LLC and may not be copied, shared, or re-published in any way! Thanks!
DIY Kids Outdoor Table Free Plans
Please read through entire plan before proceeding to build!
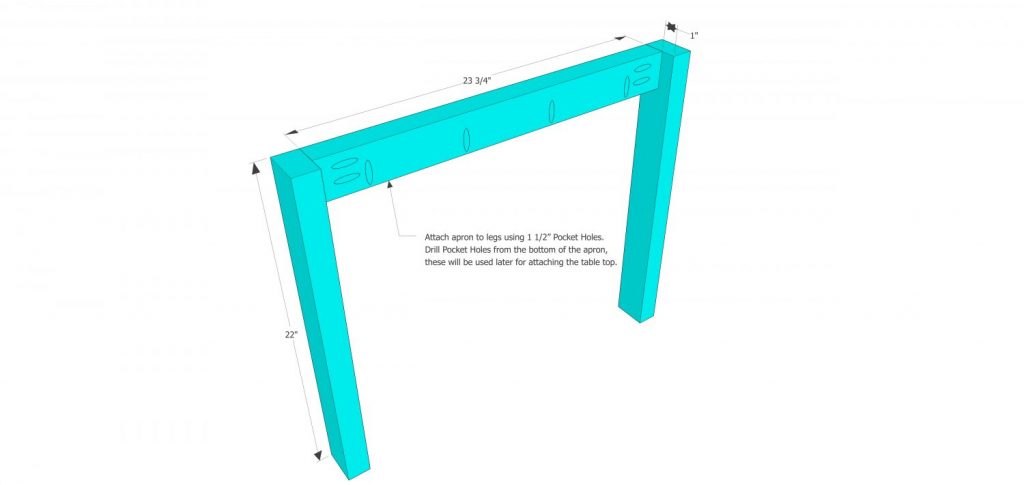
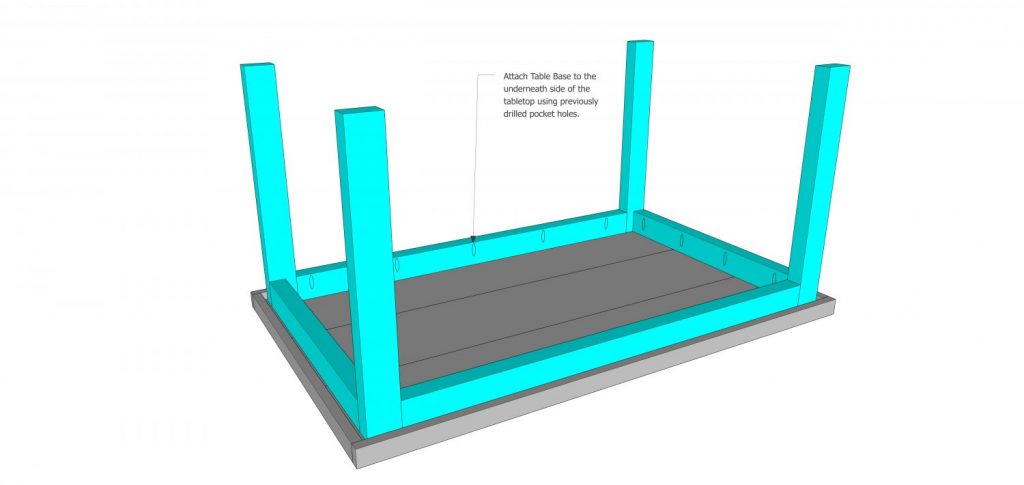
Step 1: Build the table legs by attaching apron into the legs using 1 1/2″ Pocket Holes. Before attaching the apron to the legs, drill 3/4″ Pocket Holes on the interior of the apron. These will be used to attach the table top once everything else is complete. Make sure that the pocket holes are drilled from the bottom edge towards the top of the apron so that the screw goes up into the table top! They should be spaced about 6-8″ apart starting at 2″ from the edge. Repeat these steps to build a 2nd leg assembly.
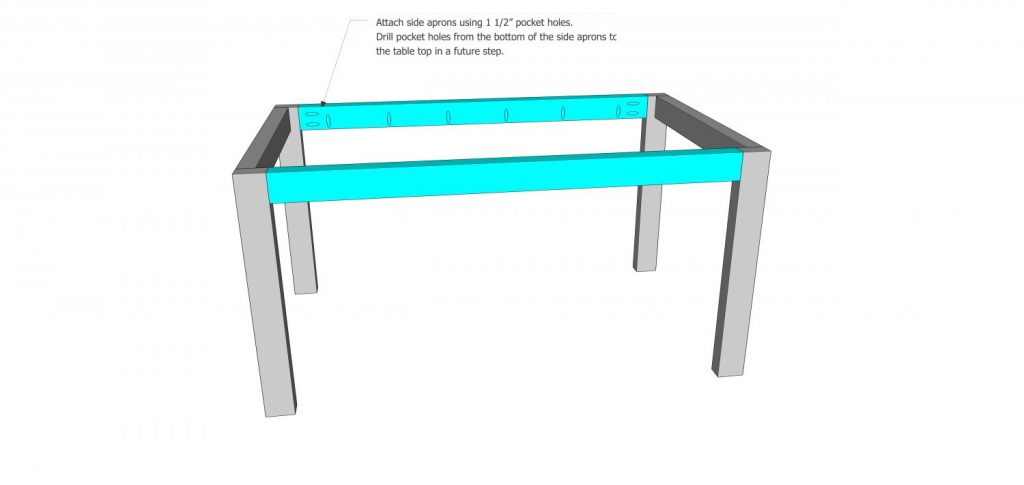
Step 2: Attach the side aprons using 1 1/2″ Pocket Holes. Before attaching the aprons to the legs, you will also need to drill the pocket holes into the interior of these aprons as well to be used for attaching the table top just as you did in the previous step.
Step 3: Assemble Table Top using 3/4″ Pocket Holes and 1 1/4″ Pocket Hole Screws, making sure the boards are flush so you have a smooth top. Drill the pocket holes into the two outside boards and and attach each to the middle board. As a general rule of thumb place one pocket hole about 2″ from each end, and space them out about every 6-8″. You will also need to drill pocket holes around the exterior perimeter of the top top. This will be used for attaching the trim pieces in the next step. I would suggest drilling all the pocket holes before assembling the table top.
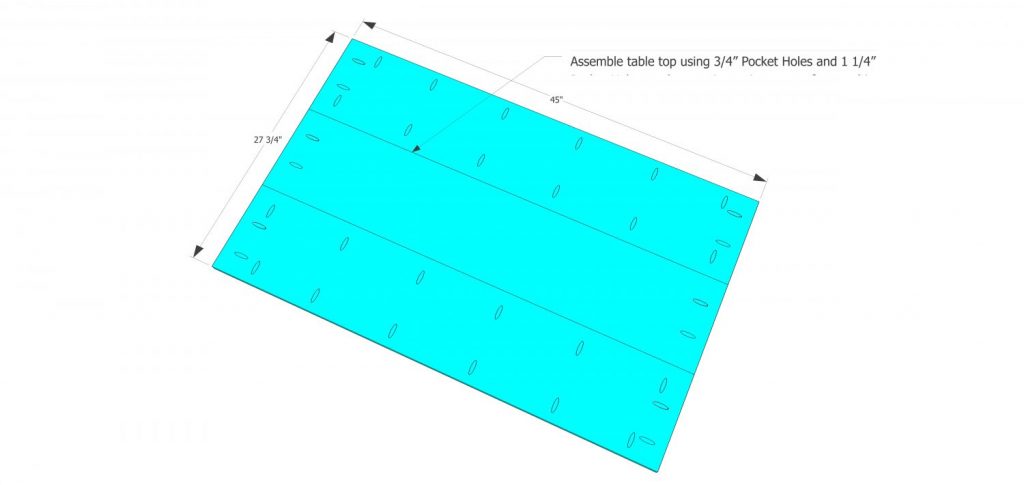
Step 4: Attach the Trim to the table top using the exterior perimeter pocket holes we drilled previously. Make sure to do this on the underneath side of the table top. The trim will have about a 3/4″ overhang on the underneath side. The trim and the top of the table need to be flush before attaching with the pocket holes. Once the trim is attached, you can use a finish nailer to secure the ends of the trim boards.
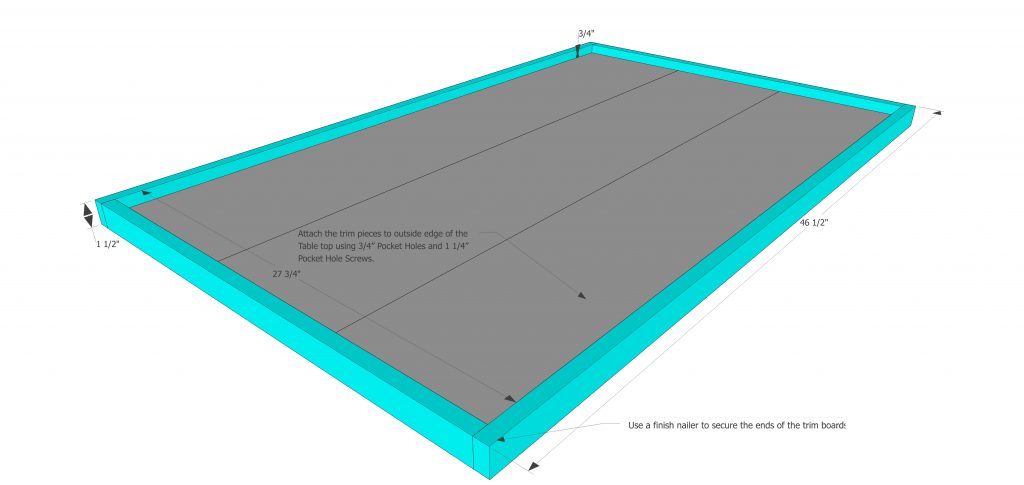
Step 5: Attach the centered table base to the bottom of the table top using the 3/4″ Pocket Holes on the insides of the apron. You may also use wood glue here for added strength if you do not intend to ever disassemble the table.
Now you can flip the table over and let the kids begin eating on and enjoying their new outdoor table!
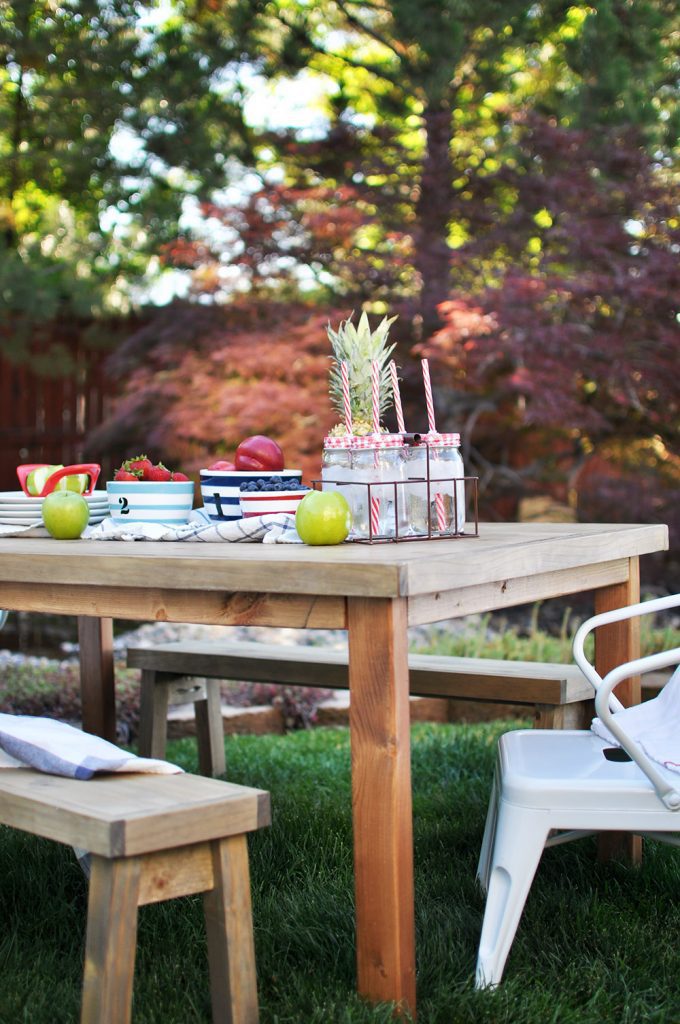
In order to finish this table I stained it with minwax weathered oak, then rubbed on minwax special walnut with a rag. I sealed it with minwax spar urethane.
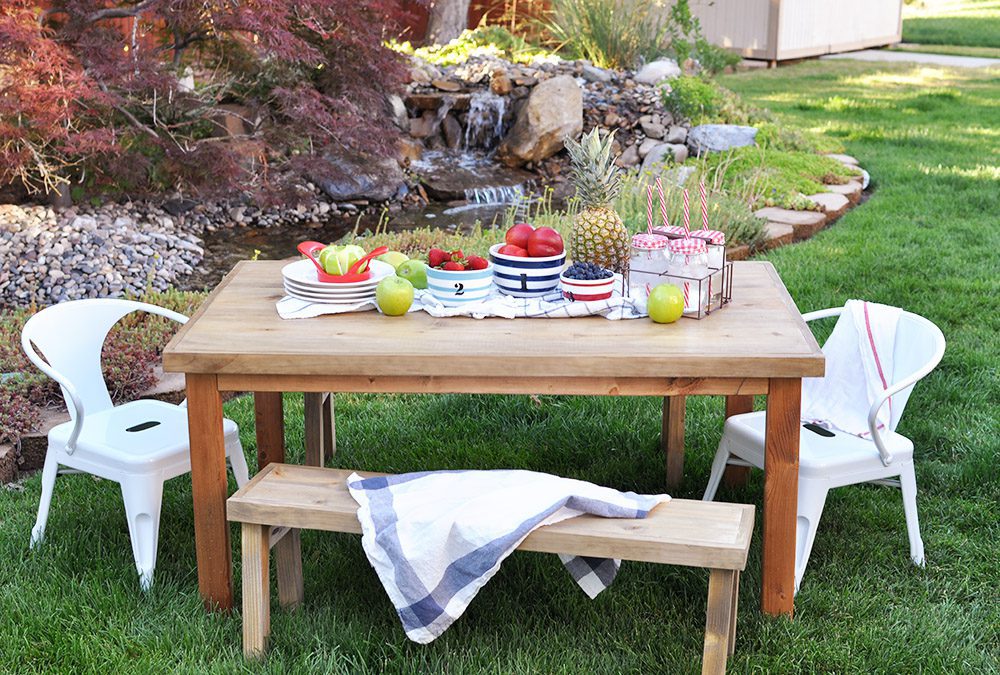
And if you are looking for those adorable white chairs, you can purchase them here!
Thanks so much for stopping by today, and I hope you enjoyed the free plans for this DIY Kids Outdoor Table! Next up on the tour is Setting for Four! She has an amazing centerpiece tutorial for you you won’t want to miss!!
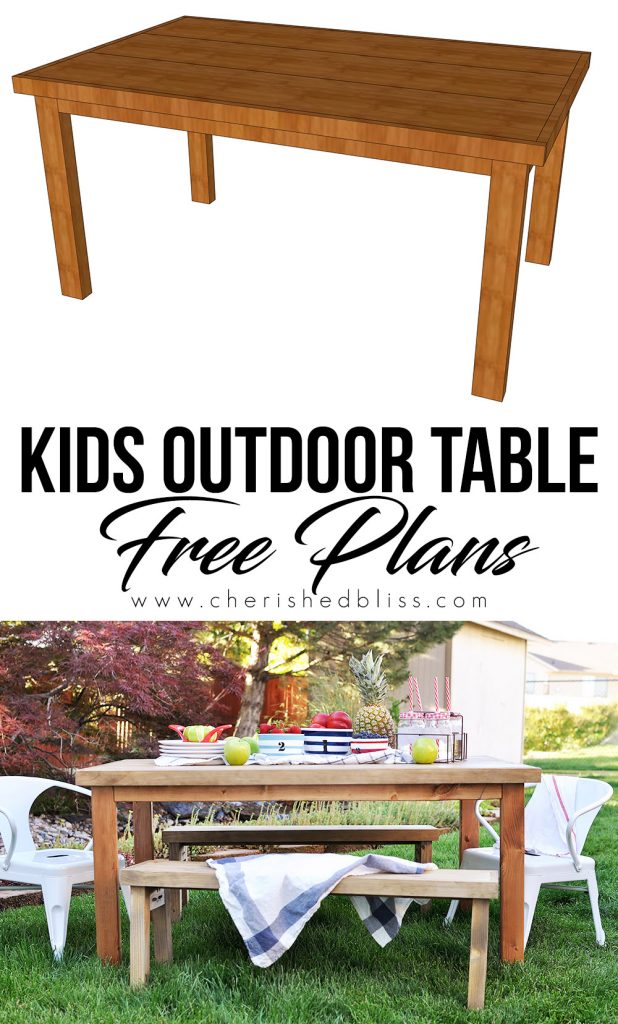
DIY Kids Outdoor Table
Looking for more furniture building plans? Check out my Project Gallery below!
It turned out great, Ashley! You are so talented. -xo
Ashley, this is the cutest thing ever! Those little metal chairs just make my heart so happy. Absolutely adorable!
So adorable Ashley! I imagine your kiddos LOVE this table and those chairs are so adorable!
This looks amazing!!! And I am so jealous you can draw plans like that . I love your outdoor pond area, so cute.
this is looking good and friendly for kid, really well planned project
I am IN LOVE with this design! It’s absolutely perfect! Were the bench plans ever posted?? They are adorable!!
hi there
i am new to DIY and came across your blog. I got some things that i am planning to do but i can’t understand how the cut list works.
in the cut list below , i can tell first digit is the corresponds to the number of these cuts, but what does second set of figure means? e.g. 2×3 or 1×10 etc. i can tell 39 1/8″ is length of the cut but i cannot understand what is 2×3 or 1×10?
4 – 2×3 @ 39 1/8″
2 – 2×3’s @ 39 1/8
2 – 2×3’s @ 23 3/4″
3 – 1×10 @ 45″
can you please help.
thanks
Hi, this table is amazing I am getting ready to build! Is there any plans for the benches?? I would like to make the entire set :)
https://kkongmoney.com/
Hi! Did you ever publish the plans for these benches? Thank you!
Thanks for sharing this information. I really like it very much. You have really shared a informative and interesting post with people snow plow service
you need to know to a jigsaw blade is most important for making a table.
Great stuff! I appreciate the work done here! pest control
Hi there, I’m looking for the bench plans as well. I searched the site and don’t see them. Would love to have them. Thanks!