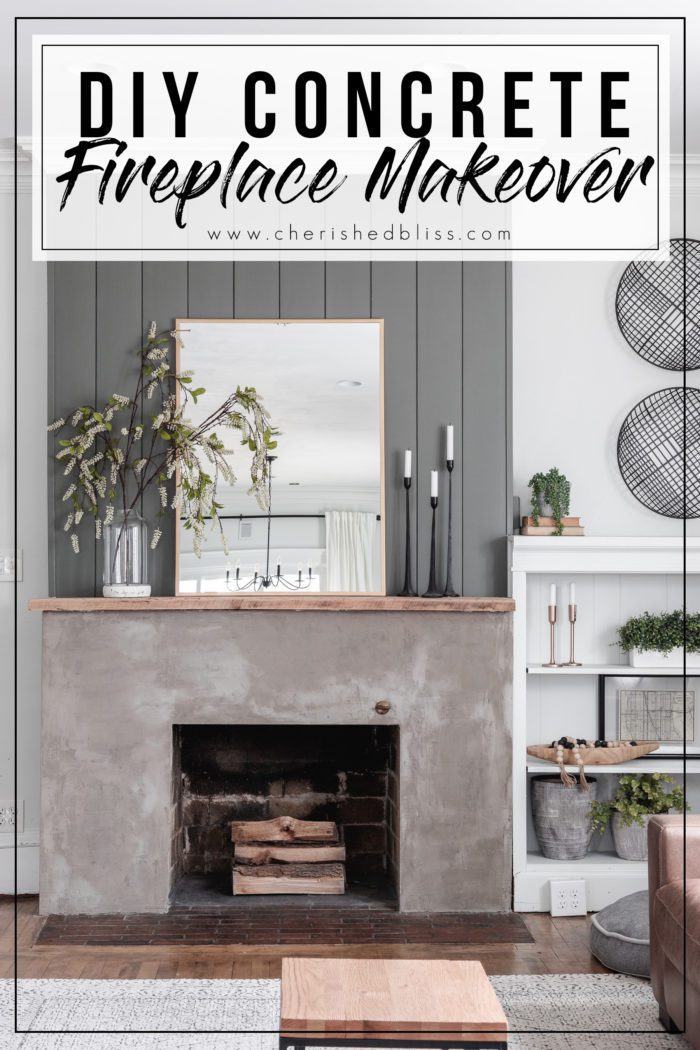
An old, ugly fireplace gets a complete budget friendly makeover. Come get the tutorial for this DIY Concrete Fireplace Makeover!
This post has been a long time coming. We completely redid our fireplace last fall and I never actually shared the tutorial. I intended to wait a little while to make sure everything held up well, which I’m happy to report it’s held up fantastic! However, I didn’t necessarily intend to wait a whole year! I’ll skip the small talk and get straight to the tutorial for you! But first let’s take a look at how the fireplace started out so you can get a better idea for how we accomplished this trendy concrete look!
Brick Fireplace BEFORE
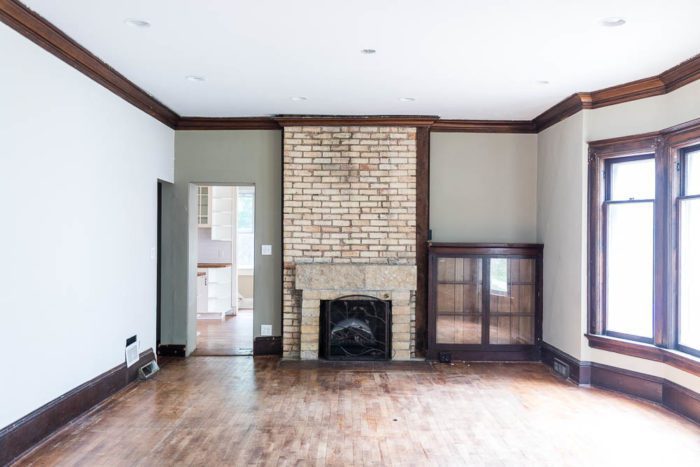
One of the biggest issues I had with this fireplace was the lack of symmetry. The random beam on one side. It just seriously messed with what OCD I do have. I remember a lot of people were sad I was covering up the original brick, but it wasn’t pretty brick. In fact I had a very knowledgeable reader tell me it was in fact construction brick and was never meant to be seen. The mortar was horrible and the brick was stained. Plus I’ve always wanted a concrete fireplace so I went for it! Now, let’s talk about how I got it to this…
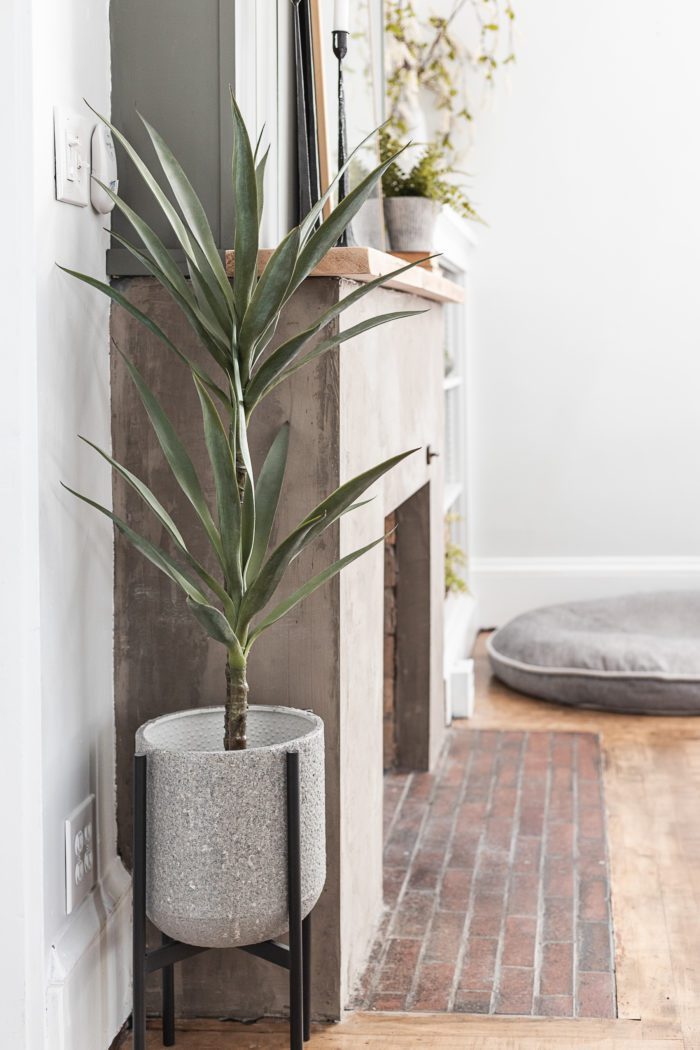
Brick Fireplace AFTER

How to DIY a Concrete Fireplace
This post contains affiliate links
Supplies for a concrete fireplace makeover:
- Ardex Feather Finish
- 2x4s
- 1x4s
- Cement Board
- Cement Board Screws
- Impact Driver
- Utility Knife
- Corner Bead
- Hammer Drill
- Brick Anchors
- 1/4″ Masonry Drill Bit
- Cement Board Mesh Tape
- Hammer
- Level
- Drywall Tray
- Drywall Knife
- Bucket for Mixing Concrete
- Shiplap
- Nail Gun
- Grouting Sponge

Framing out a fireplace for a faux concrete finish
Cleaning is always the number one thing when you start projects, therefore you want to make sure your surfaces start off clean! After that we started the framing. We wanted to center up the mantel and hide the beam. We also wanted the fireplace to sit flush up against the built-ins. The framing will really depend on your specific situation. Just make sure your framing allows for the additional thickness of your cement board. But this is where you determine the shape of your fireplace. I wanted a smooth front with a ledge for the mantel. We used our brick anchors to attach the 2×4’s to the brick.

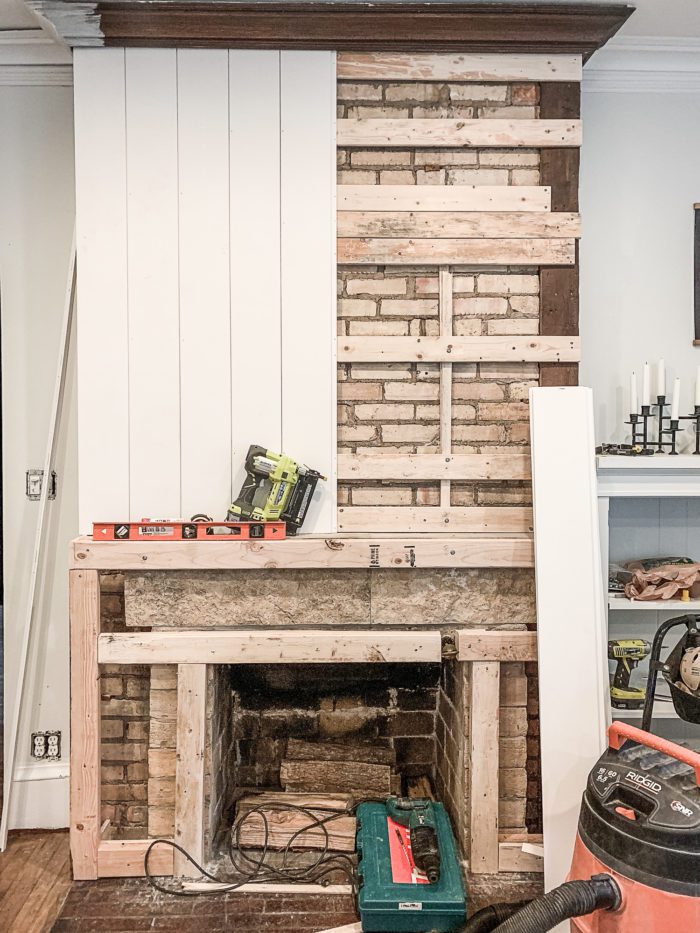
Framing for Shiplap over Brick Fireplace
After we got the framing in place for the concrete portion of the fireplace we moved in to the top section where I wanted vertical shiplap. Our brick wasn’t level so you’ll see we had to use a vertical shim to get everything to be placed correctly. Then we attached horizontal board across the brick to give us something to nail the shiplap into. Again, using the brick anchors. We also installed several board where I would typically hang anything to give us a nice sturdy option.
After framing is in place attach the shiplap with a finish nailer. Fill any holes and sand as necessary. The most difficult part of installing the shiplap is deciding how you want to wrap the corners. You can cut the length at a 45, or you can just trim off the lip of the shiplap and have a smooth edge. It depends on the depth of your fireplace, you can also use a piece of wood on the side and have the shiplap meet up against it.
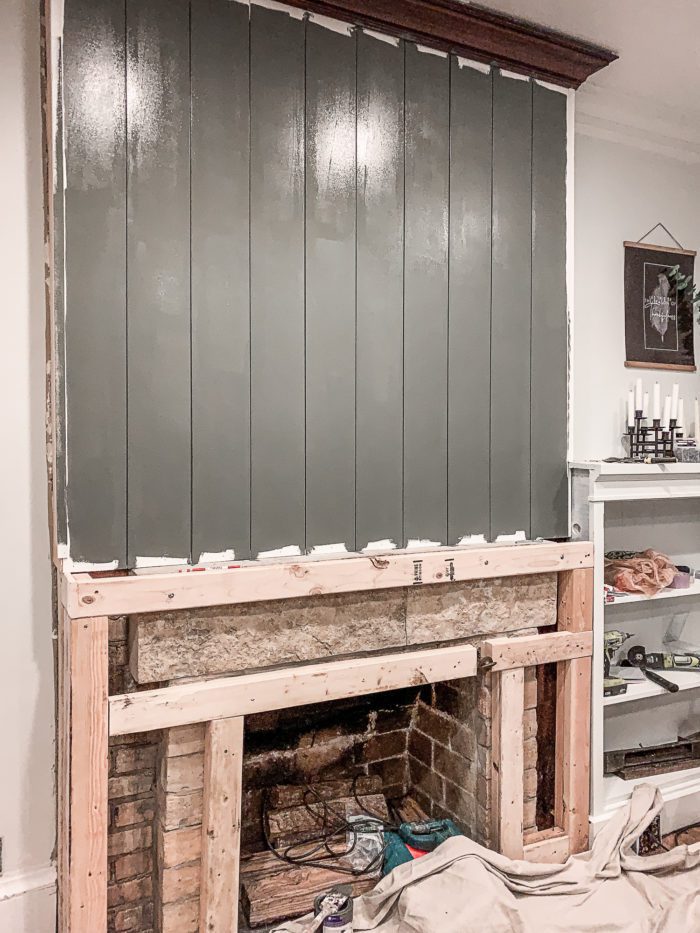
Painting Shiplap Above a Fireplace
This step could really be at the end, but I was impatient and trying to decide on a color so I went ahead and rolled on a coat.
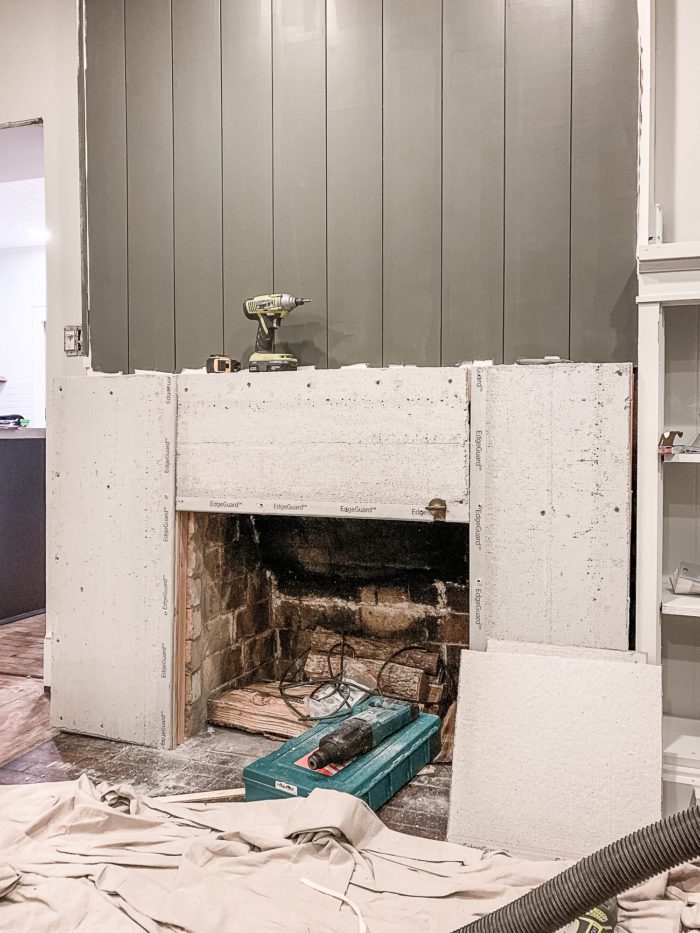
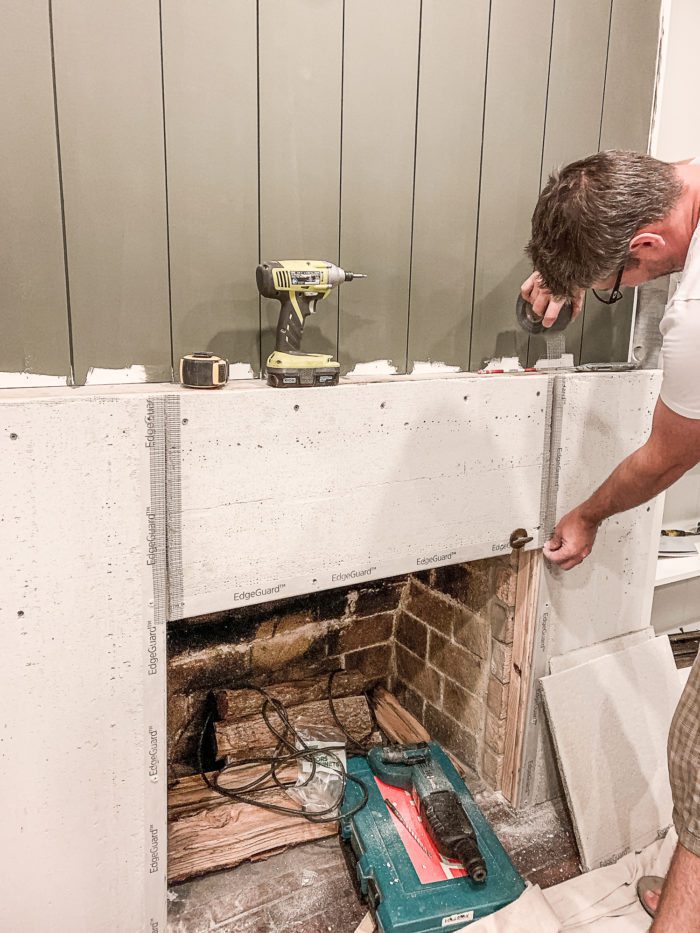
Install Cement Board on Framing
Next up we will begin installing the cement board. Begin by cutting each piece to size using a utility knife to score and snap the board. Install the cement board to cover all surfaces. Don’t worry about the corners being perfect, we will be adding corner bead to that! There is usually an edge to certain sides of the cement board that taper off making the joints easier to hide, so place those accordingly

Cement board is attached to the framing with specific screws. Make sure you are using the proper length for the cement board you choose.
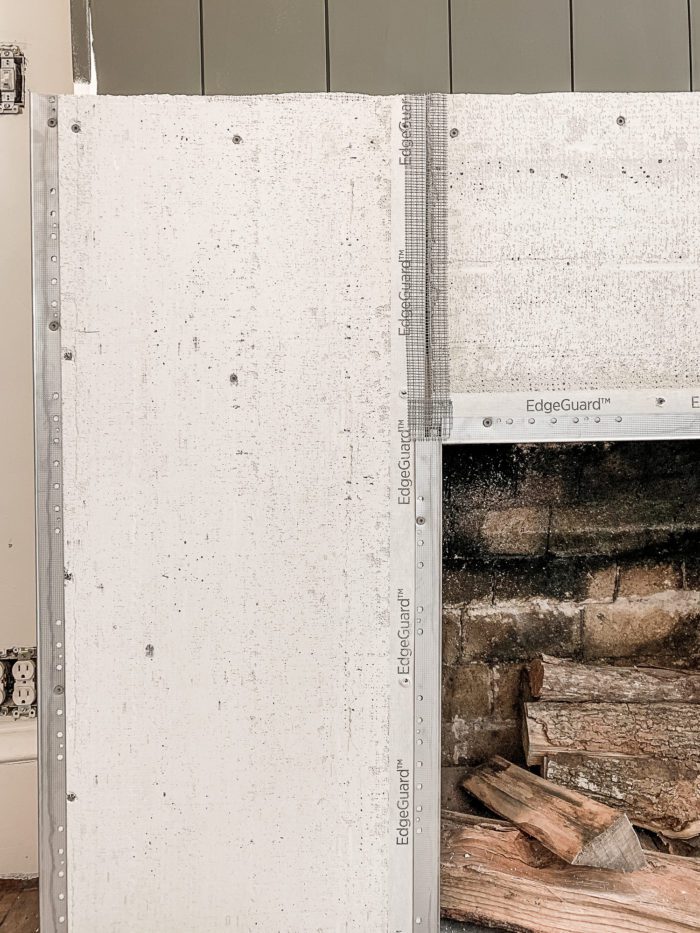
Add Mesh Tape and Corner Bead to Cement Board
Now it’s time to hide those seams. Using the mesh tape meant specifically for cement board, apply it directly over all seams.
After the tape is in place, cover all corners with the metal corner bead and attach with the same screws you used for attaching the cement board to the framing.
Begin Applying Ardex Feather Finish to Cement Board
Next up it’s time to turn these construction materials into a Concrete Fireplace! I used Ardext Feather Finish concrete to apply to the cement board. It’s almost like skim coating if you’ve ever done that. But for this step you do have to work pretty quickly and here’s my number one tip. Work in small batches because it dries VERY fast! You can layer it and layer it until you get it perfect, but don’t try to glob it on. I did about 3-4 coats over the whole thing, but I had to mix way more than that.
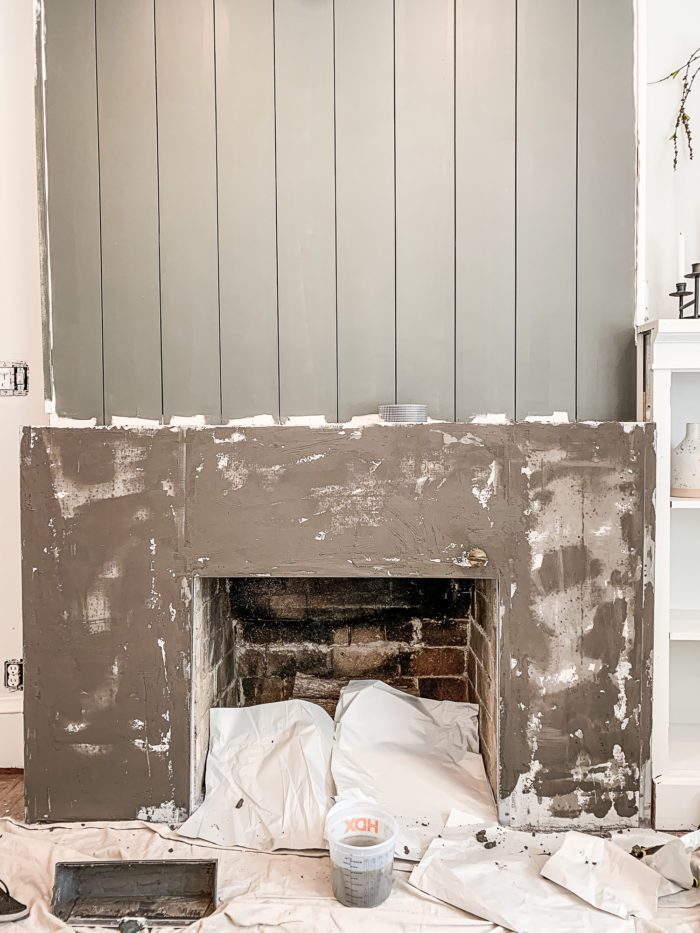
Follow the instructions on the Ardex Bag for application. I did choose to mix mine a little thinner (but not much), because it was easier to work with. I applied the Ardex with a drywall taping knife. This allowed for great application
Tips for Using Ardex Feather Finish on a Concrete Fireplace
- When applying Ardex make sure to mix in small batches
- Applying using a drywall tape knife
- Use a wet grout sponge to smooth out any marks (wet sanding)
- Apply in varying directions to randomize any marks or color variations
When applying the final coat I used a wet sponge to smooth out any lines, then I let it dry mostly and smoothed it out again with the sponge.
Let that dry, then if you have any noticeable marks left after dry time you can sand it, but I’ve heard it’s very messy, so take that into consideration.
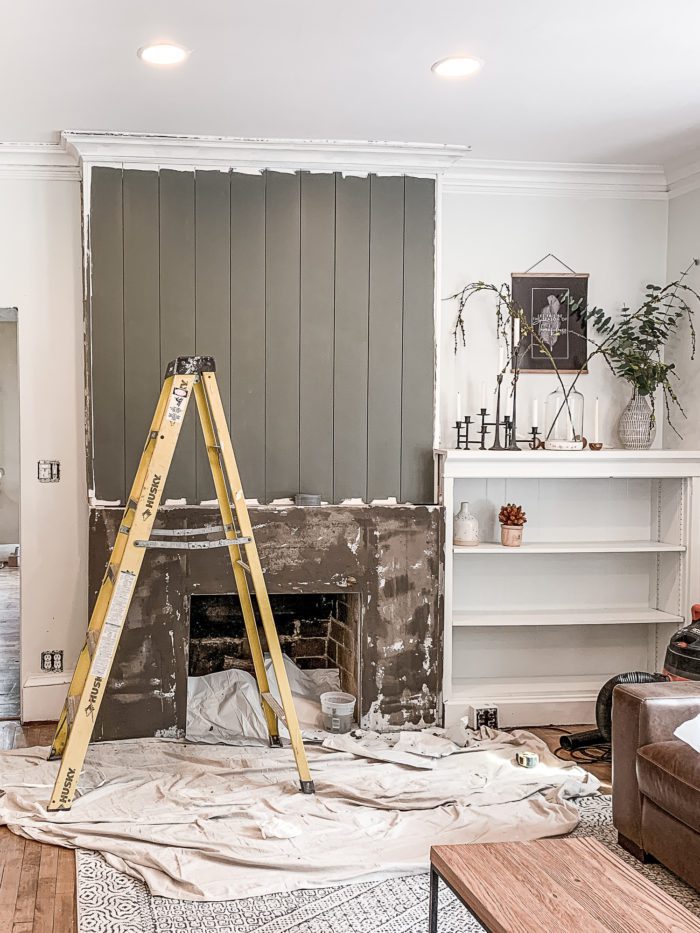
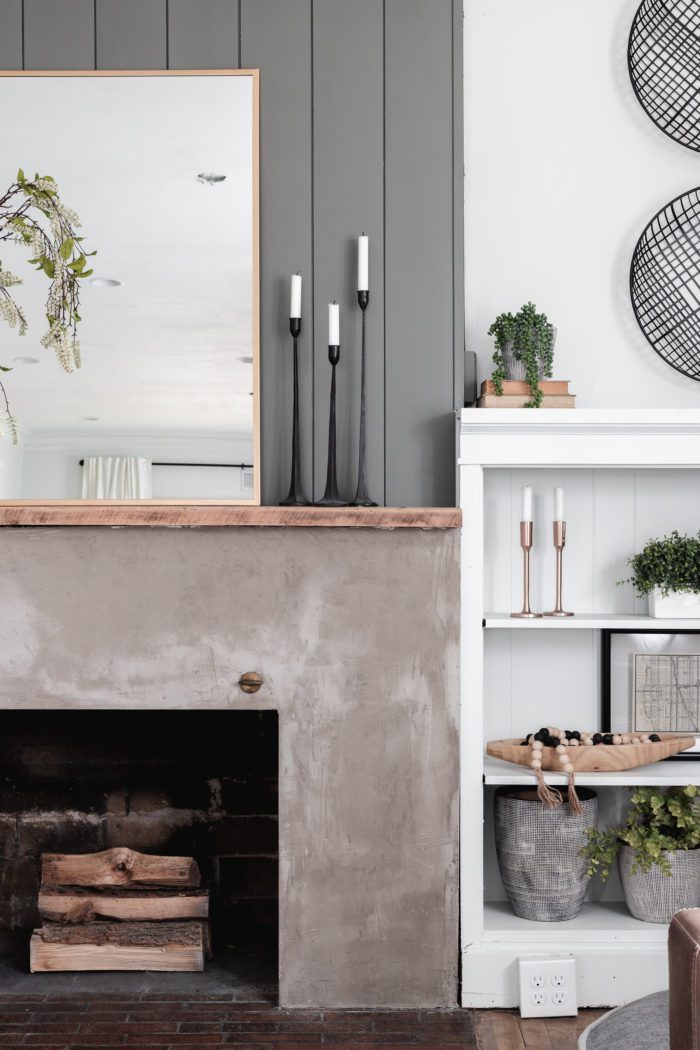
Concrete Fireplace Before & After

After we finished all the concrete work we did any necessary touch up painting, caulking, and installed a simple board for a mantel.
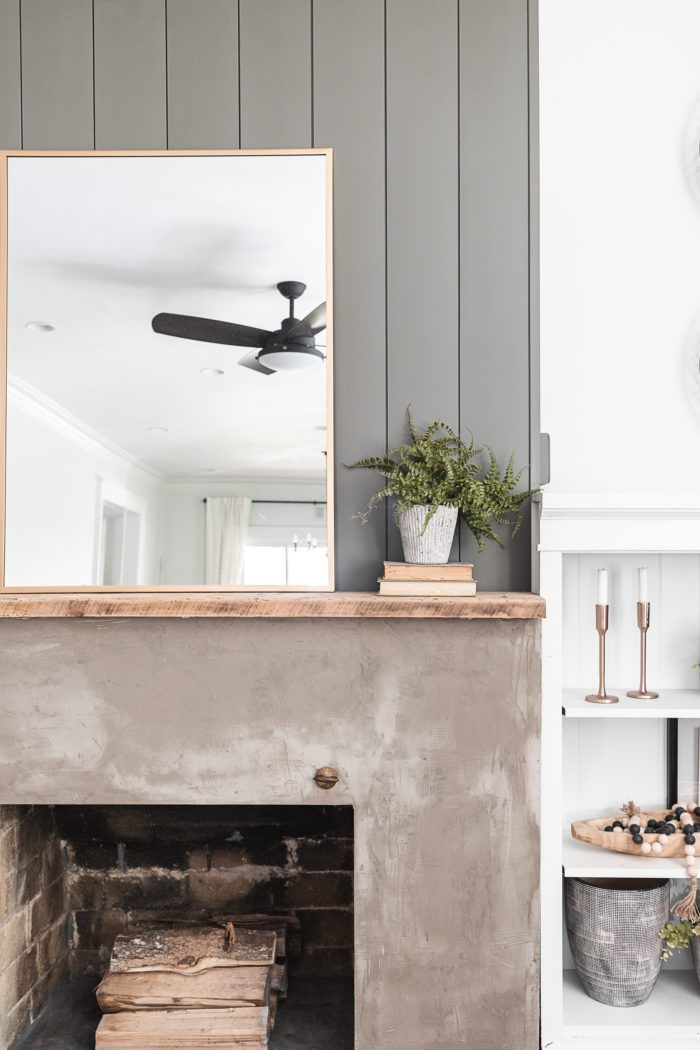
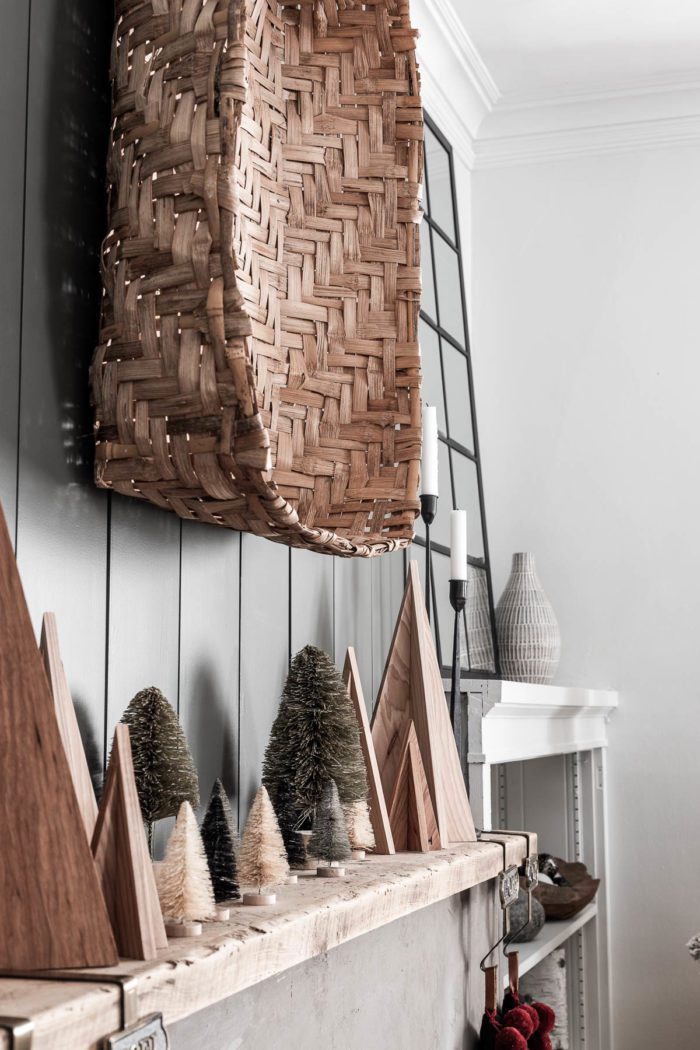
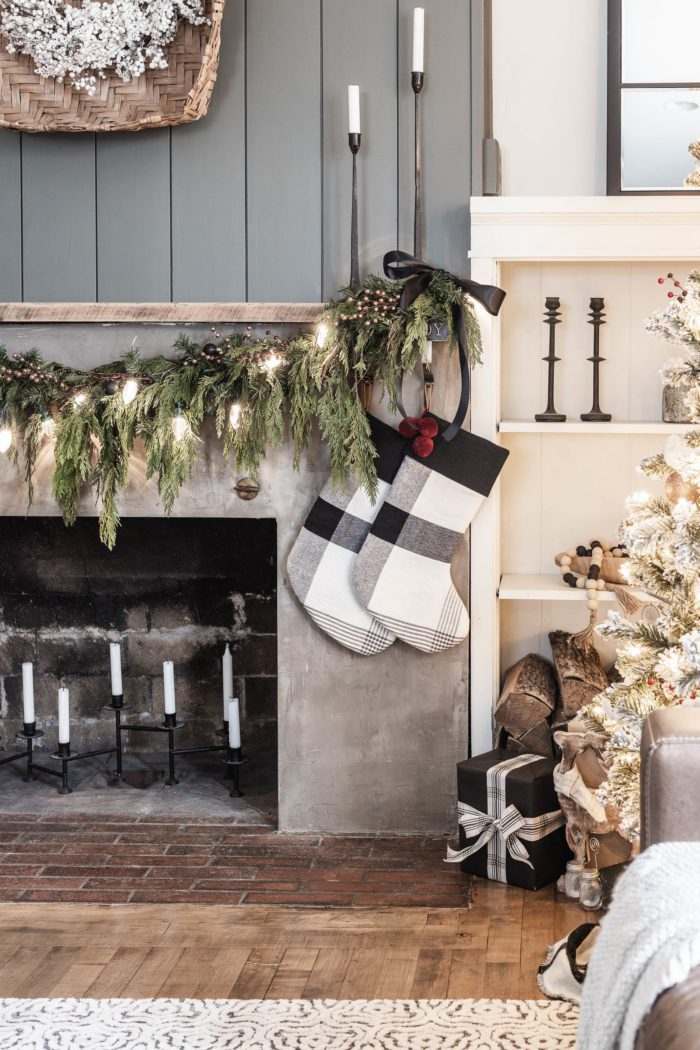
One benefit of me waiting so long to share the tutorial is now you can see it decorated for every single season! Click the images below for more details!

Now you’re ready to completely transform your old fireplace into a gorgeous concrete fireplace! To see this project on video you can check out the highlights on my Instagram Stories
Like this Project?? Pin it for LATER
For more DIY Projects, be sure and check out my Project Gallery!
No Pin button? Am I doing something wrong? Thanks for sharing wonderful project!!
Sheila
Thanks Sheila! You should just be able to hover over the image and it pops up in the upper left corner. Let me know if you still don’t see it.
Love the makeover, but I can’t find a pin button either.
The fireplace looks amazing. Could you tell me where you got the white open shelf cabinet to the right of the fireplace. been looking for something like that in my living room.
Thanks
Kim
What color is the green paint?? I Love IT.
Wow! Your fireplace makeover is a great idea! I like how modern it turned out.
Have a great week,
Kippi
Thanks so much!
That is crazy cool! I love how it turned out. Y’all have some serious gumption! Kinda jealous over here. Pinned!
Thanks so much!
Beautiful makeover. What color is the shiplap painted?
Thank you! It’s Called Cast Iron from Sherwin Williams. :)
Hi beautiful job. Read your blog because we are getting ready to do the same. Curious If you ever painted it and if not how is it holding up?
What a gorgeous makeover of your fireplace! LOVE the shiplap look with the concrete surround!
Thank you!
omg ashley you’ve done it again! that shiplap is to die! i’ve been admiring your work a while now tbh. started out w a dresser myself over the quarantine w https://bit.ly/3gA8tFg heheh i hope one day soon i’ll have the courage to tackle more challenging projects like yours on here
sarah
This makeover is stunning. Its so inspiring to those with meh fireplaces. Love this.
Out of curiosity, what width of shiplap did you use (1×6) ? Also, what are the approx. dimensions of the fireplace? We are trying to do this exact project! Thank you!
How did you get the variation in color? I’m in the process but the color is pretty consistent. I like your variation.
I was wondering the same thing! This looks amazing and I want to either try it myself or have someone do it, but I want the variations in color/texture that Ashley achieved!
Absolutely beautiful! You are very talented. I’m thinking of doing something similar to our fireplace, but I’m afraid I won’t be able to use it. Can you still use your fireplace? Thank you, Jennifer
This looks amazing! Did you seal the concrete with anything once it dried? A clear coat of any kind?
The result is amazing. I think you can take on such work with your own hands only if you are sure of a positive result. Otherwise, it is better to hire a good contractor who will do everything professionally. Read thumbtack com reviews to understand which platform is best used for this purpose
I love this!! Could you please provide the dimensions of the fireplace? I am looking to redo my fireplace but struggling to determine how far out I should take the concrete. Also, did you build the white shelving to the right? It looks great! I would love more information about that.
Thank you!!
Emily
I love the fireplace! Can the Ardex product be applied directly to tile?
usually code says no combustible material 6 inches from the sides and 12 from the top. Those 2x4s are not the right thing to use. Unless you aren’t going to use it as a fireplace. Check your local code, redo it right if not. It’s a fire hazard.
I should look into locating a reputable utility company. They will assist with resolving a variety of issues, such as heating or hot water. These are quite common issues that people face, particularly those who have recently relocated from another city or district and know nothing about the area. So I looked up the phone number for the crown boiler company phone number and called them. You can also have a peek if you’re interested.
Hi! In your estimation, how difficult would it be to remove this, and is the structure underneath unharmed? The people who renovated/flipped my 1935 craftsman seem to have covered up the original art-deco inspired fireplace surround with this kind of method, which is nice, but not really my vibe (or the vibe of the house itself).
Hello! I love your fireplace! We are trying to make something similar. What kind of board do you use for the mantel? Thank you!
The modern concrete with the rough finish does look cool, but I honestly preferred the bricks. I’m talking with Stone Masonry Ottawa about a fireplace makeover but if I can find a way to do it myself I will. I might need some brick repair first though. Wish me luck.
This looks great, Sheila. Do you use your fireplace? Is the board and cement fire and heat proof? We have a log burner, so our fireplace gets quite hot.
Thanks
the cement thinset is fine, the Hardibacker is does have wood fiber in it and is considered fire resistant when covered with tile, but their website left me wondering, it’s a little vague the way it’s worded and sounded like you shouldn’t reduce the clearance to combustable materials. So I’m not sure what that means regarding whether it should be within the distances where combustable materials are prohibited.
This is an amazing and very important source of heat for pulp. As with a stove, in order to maintain the required temperature and extend its service life, it needs regular updating. All malfunctions that require stove repair are related to temperature conditions. Luckily, you can always call on Helios Air professionals to troubleshoot problems.
I was a little worried about the wood framing/combustible materials at 0″ from the firebox entrance. Code is typically uniform across the US becasue it’s based on the national fire protection rules, at typically 6″ from the opening, and increasing 1/8″ per inch with every 1/8″ protrusion from the face. If you use it as a fireplace please have an extinguisher handy and don’t leave it unsupervised. Also, if you sell without fixing it, please disclose so that you don’t end up liable for a mishap. If you disclose, it’s typically not your issue anymore, but you may want to consult a real estate attorney.
Do you think I could I apply the ARDEX FEATHER FINISH to fake stone tiles? I hate them and love how your fire place ended up looking!